Favorite Searches
9.2.7. Favorite Searches
Specifically, in the Inventory Management tab of the Connectivity Management module, the user can save search queries from the advanced search page, using IoTM's “favorite searches” bookmarking. Saved search results can then be revisited and executed in the future. Note that what is saved is the search criteria and not the connections population. Therefore, the actual connections population might be different when the search is being executed at different times.
9.2.7.1. Saving a Favorite Search from Omni-search
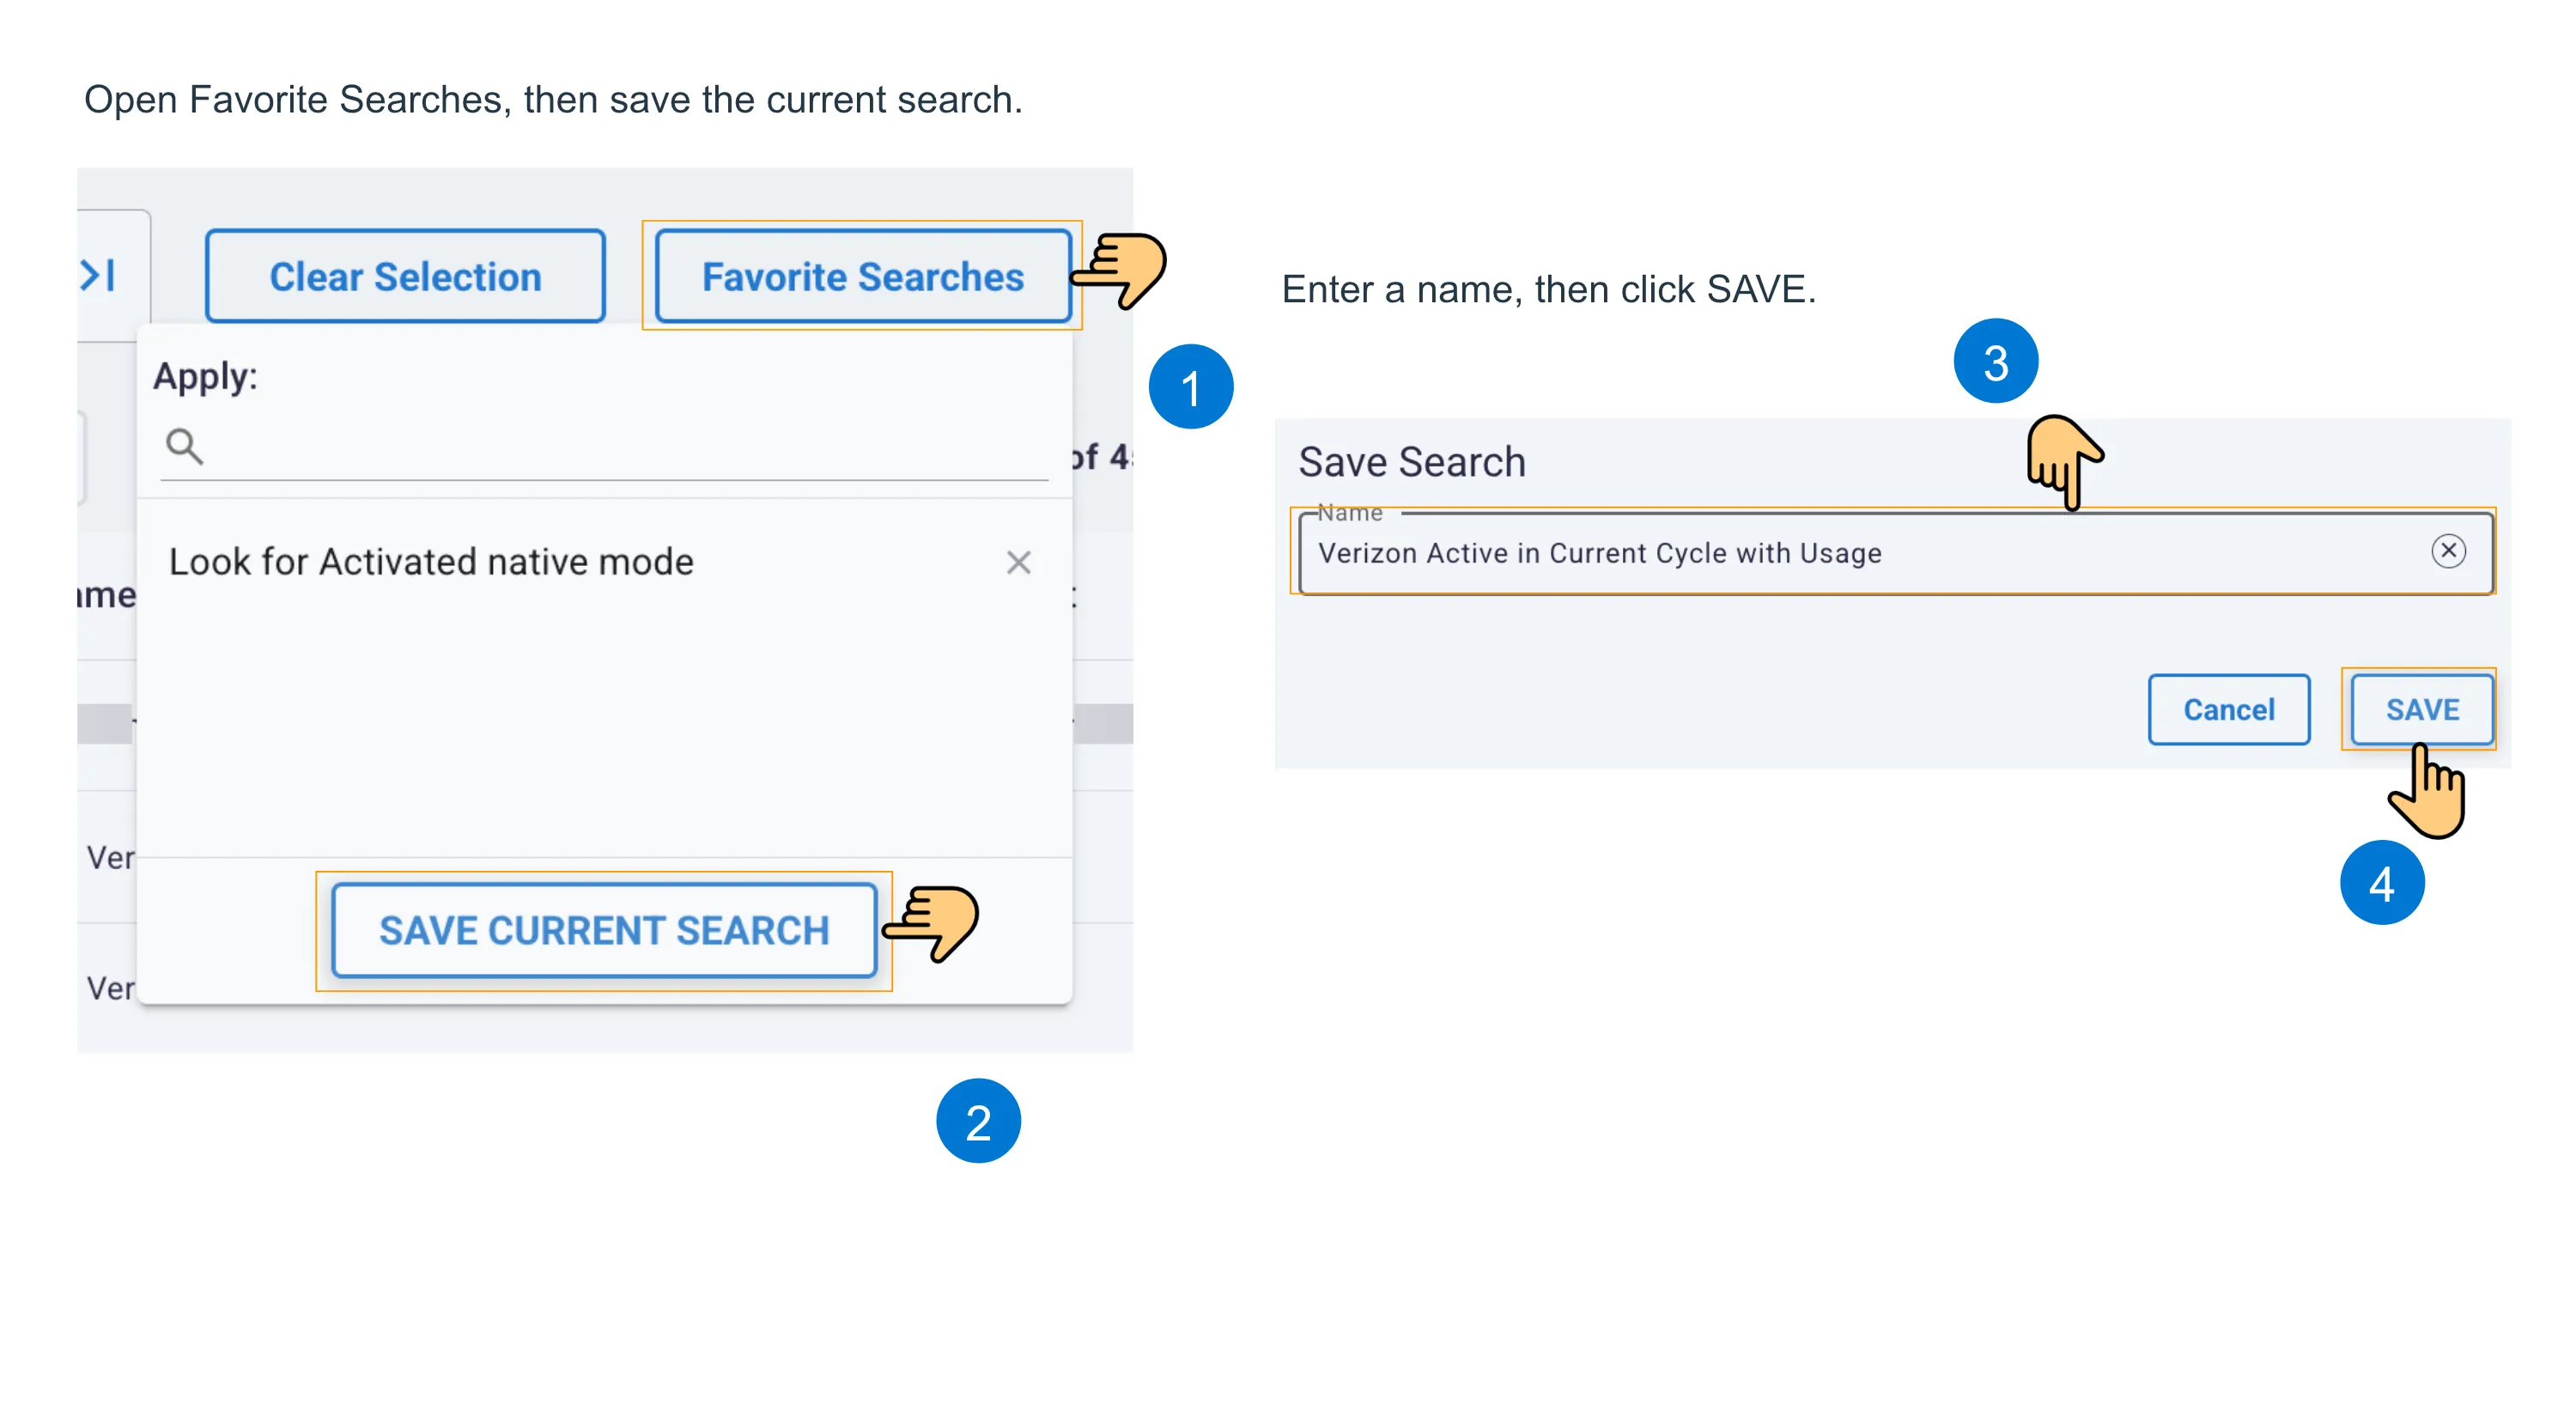
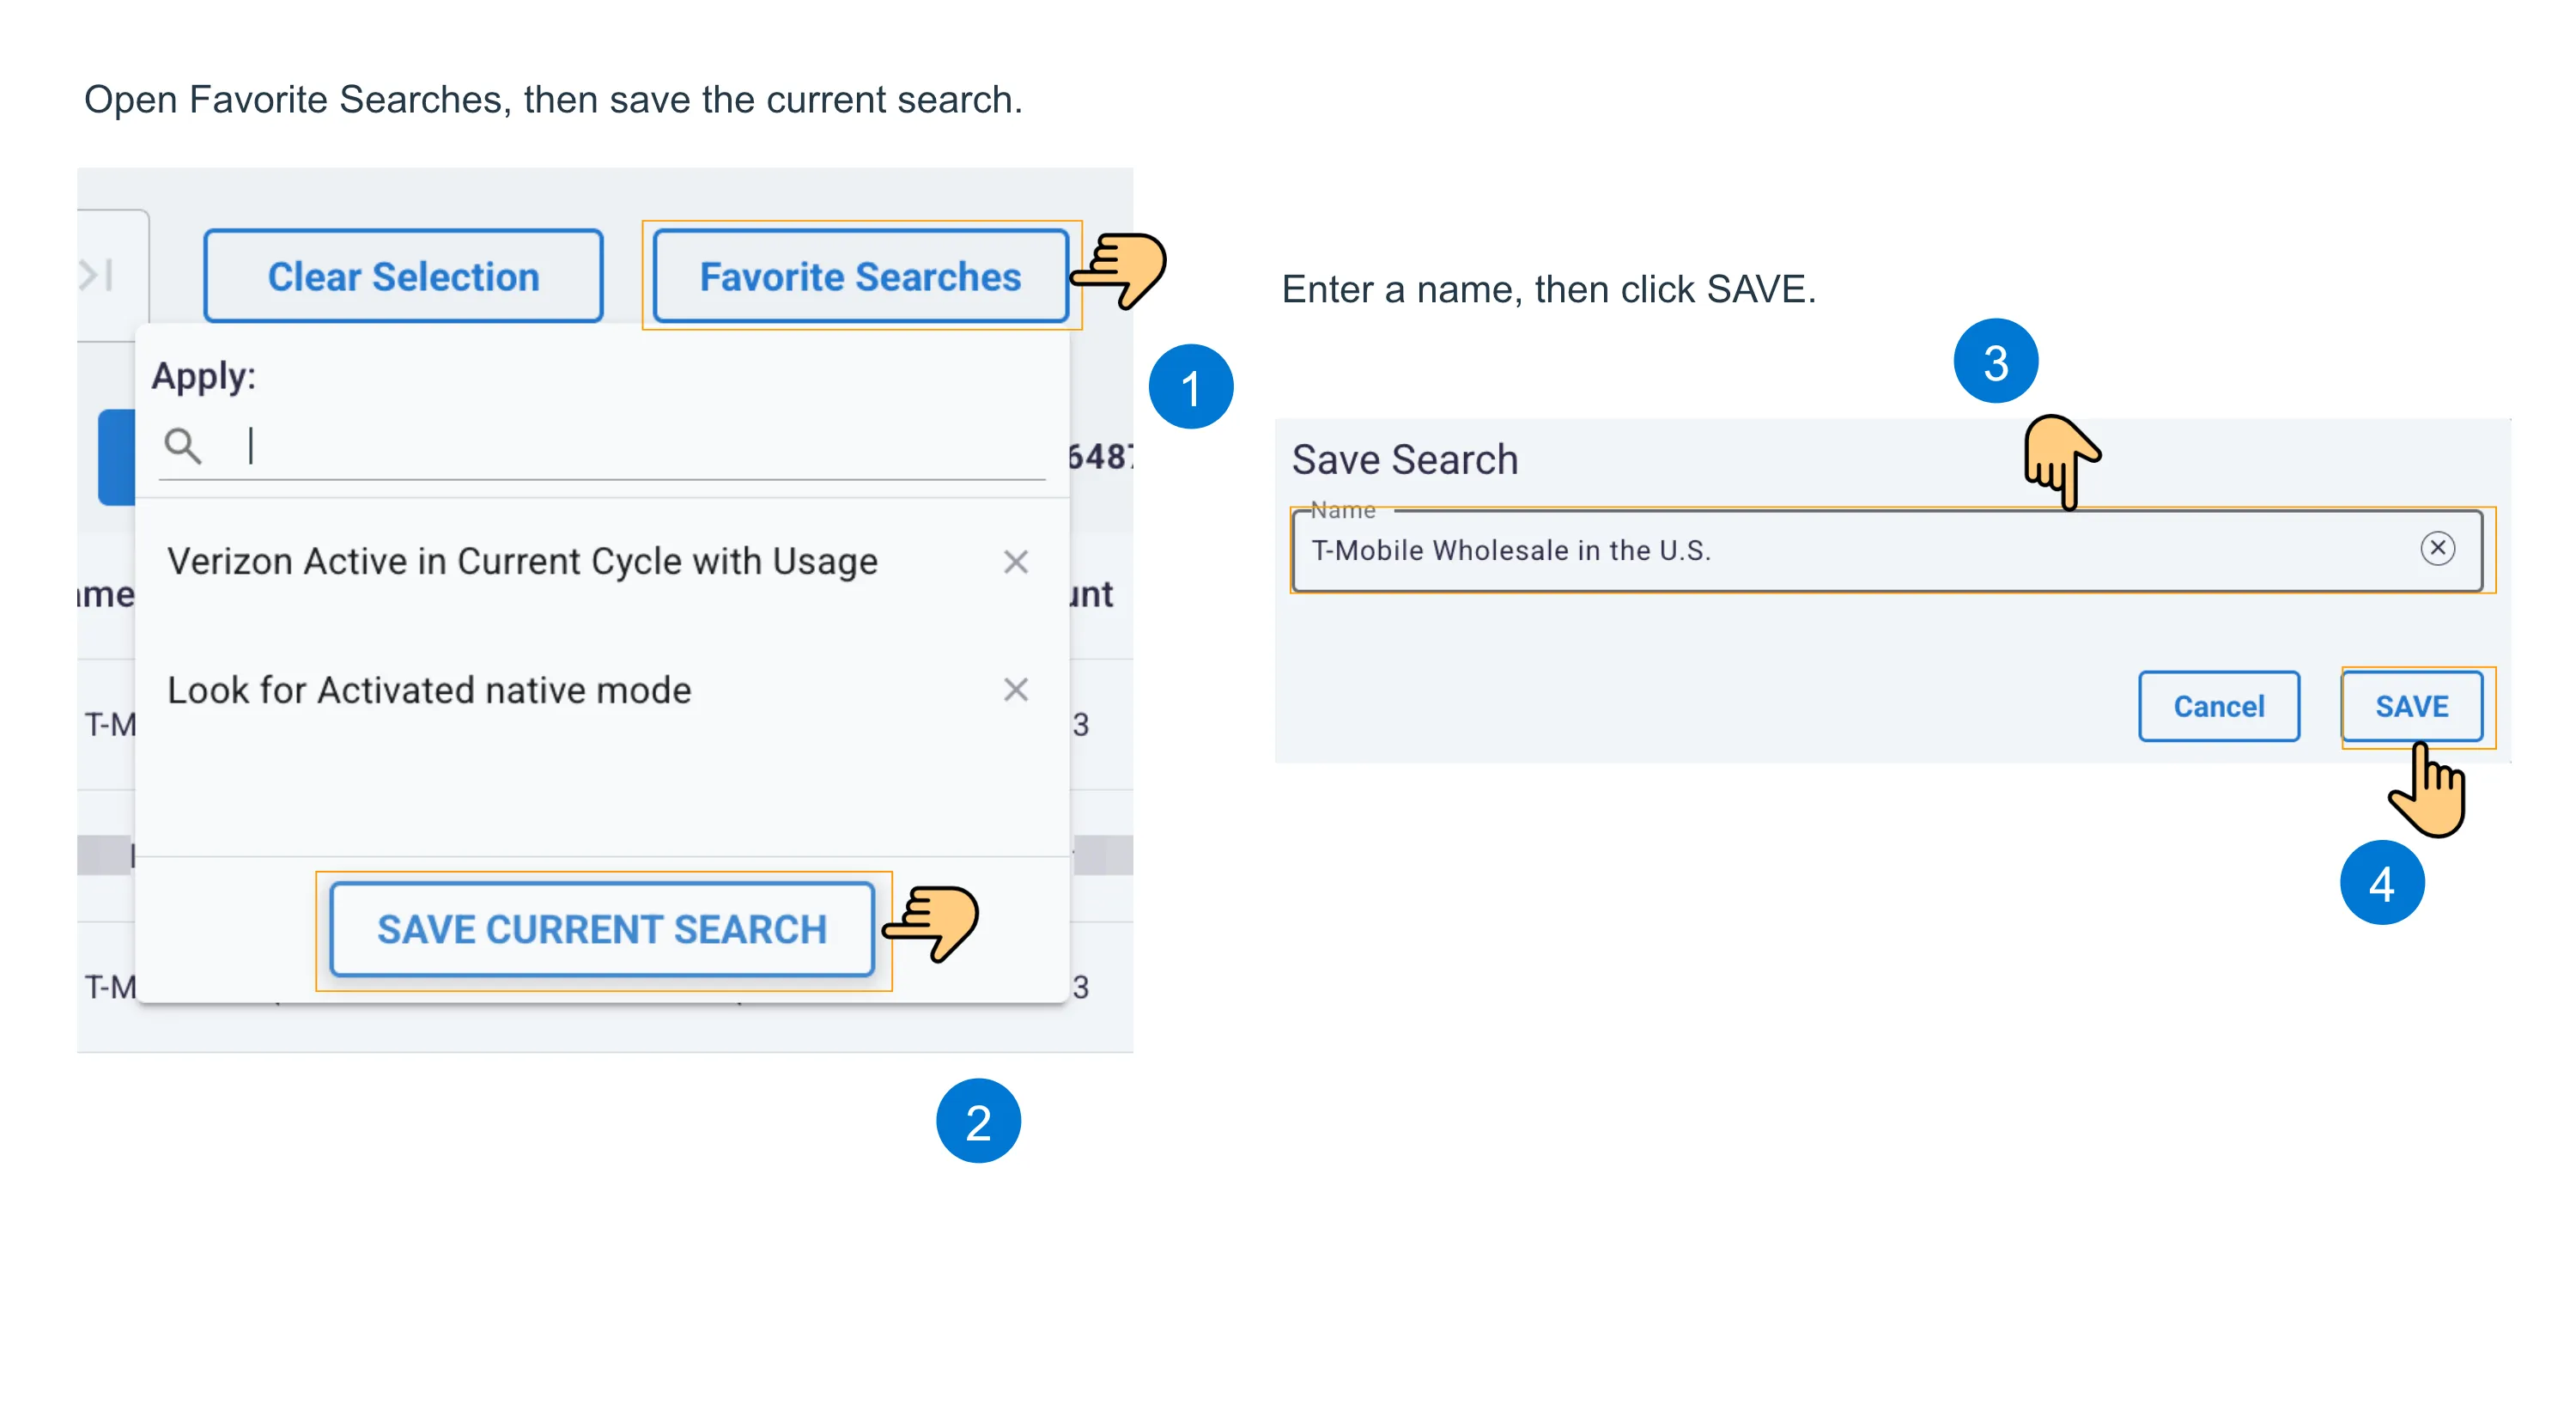
The user can bookmark a search directly from the advanced search page by clicking the “Save Search” button, or from the inventory page by clicking the “Favorite Searches” button to open the dropdown menu and then clicking “SAVE CURRENT SEARCH”. Enter a name for the search and click SAVE.
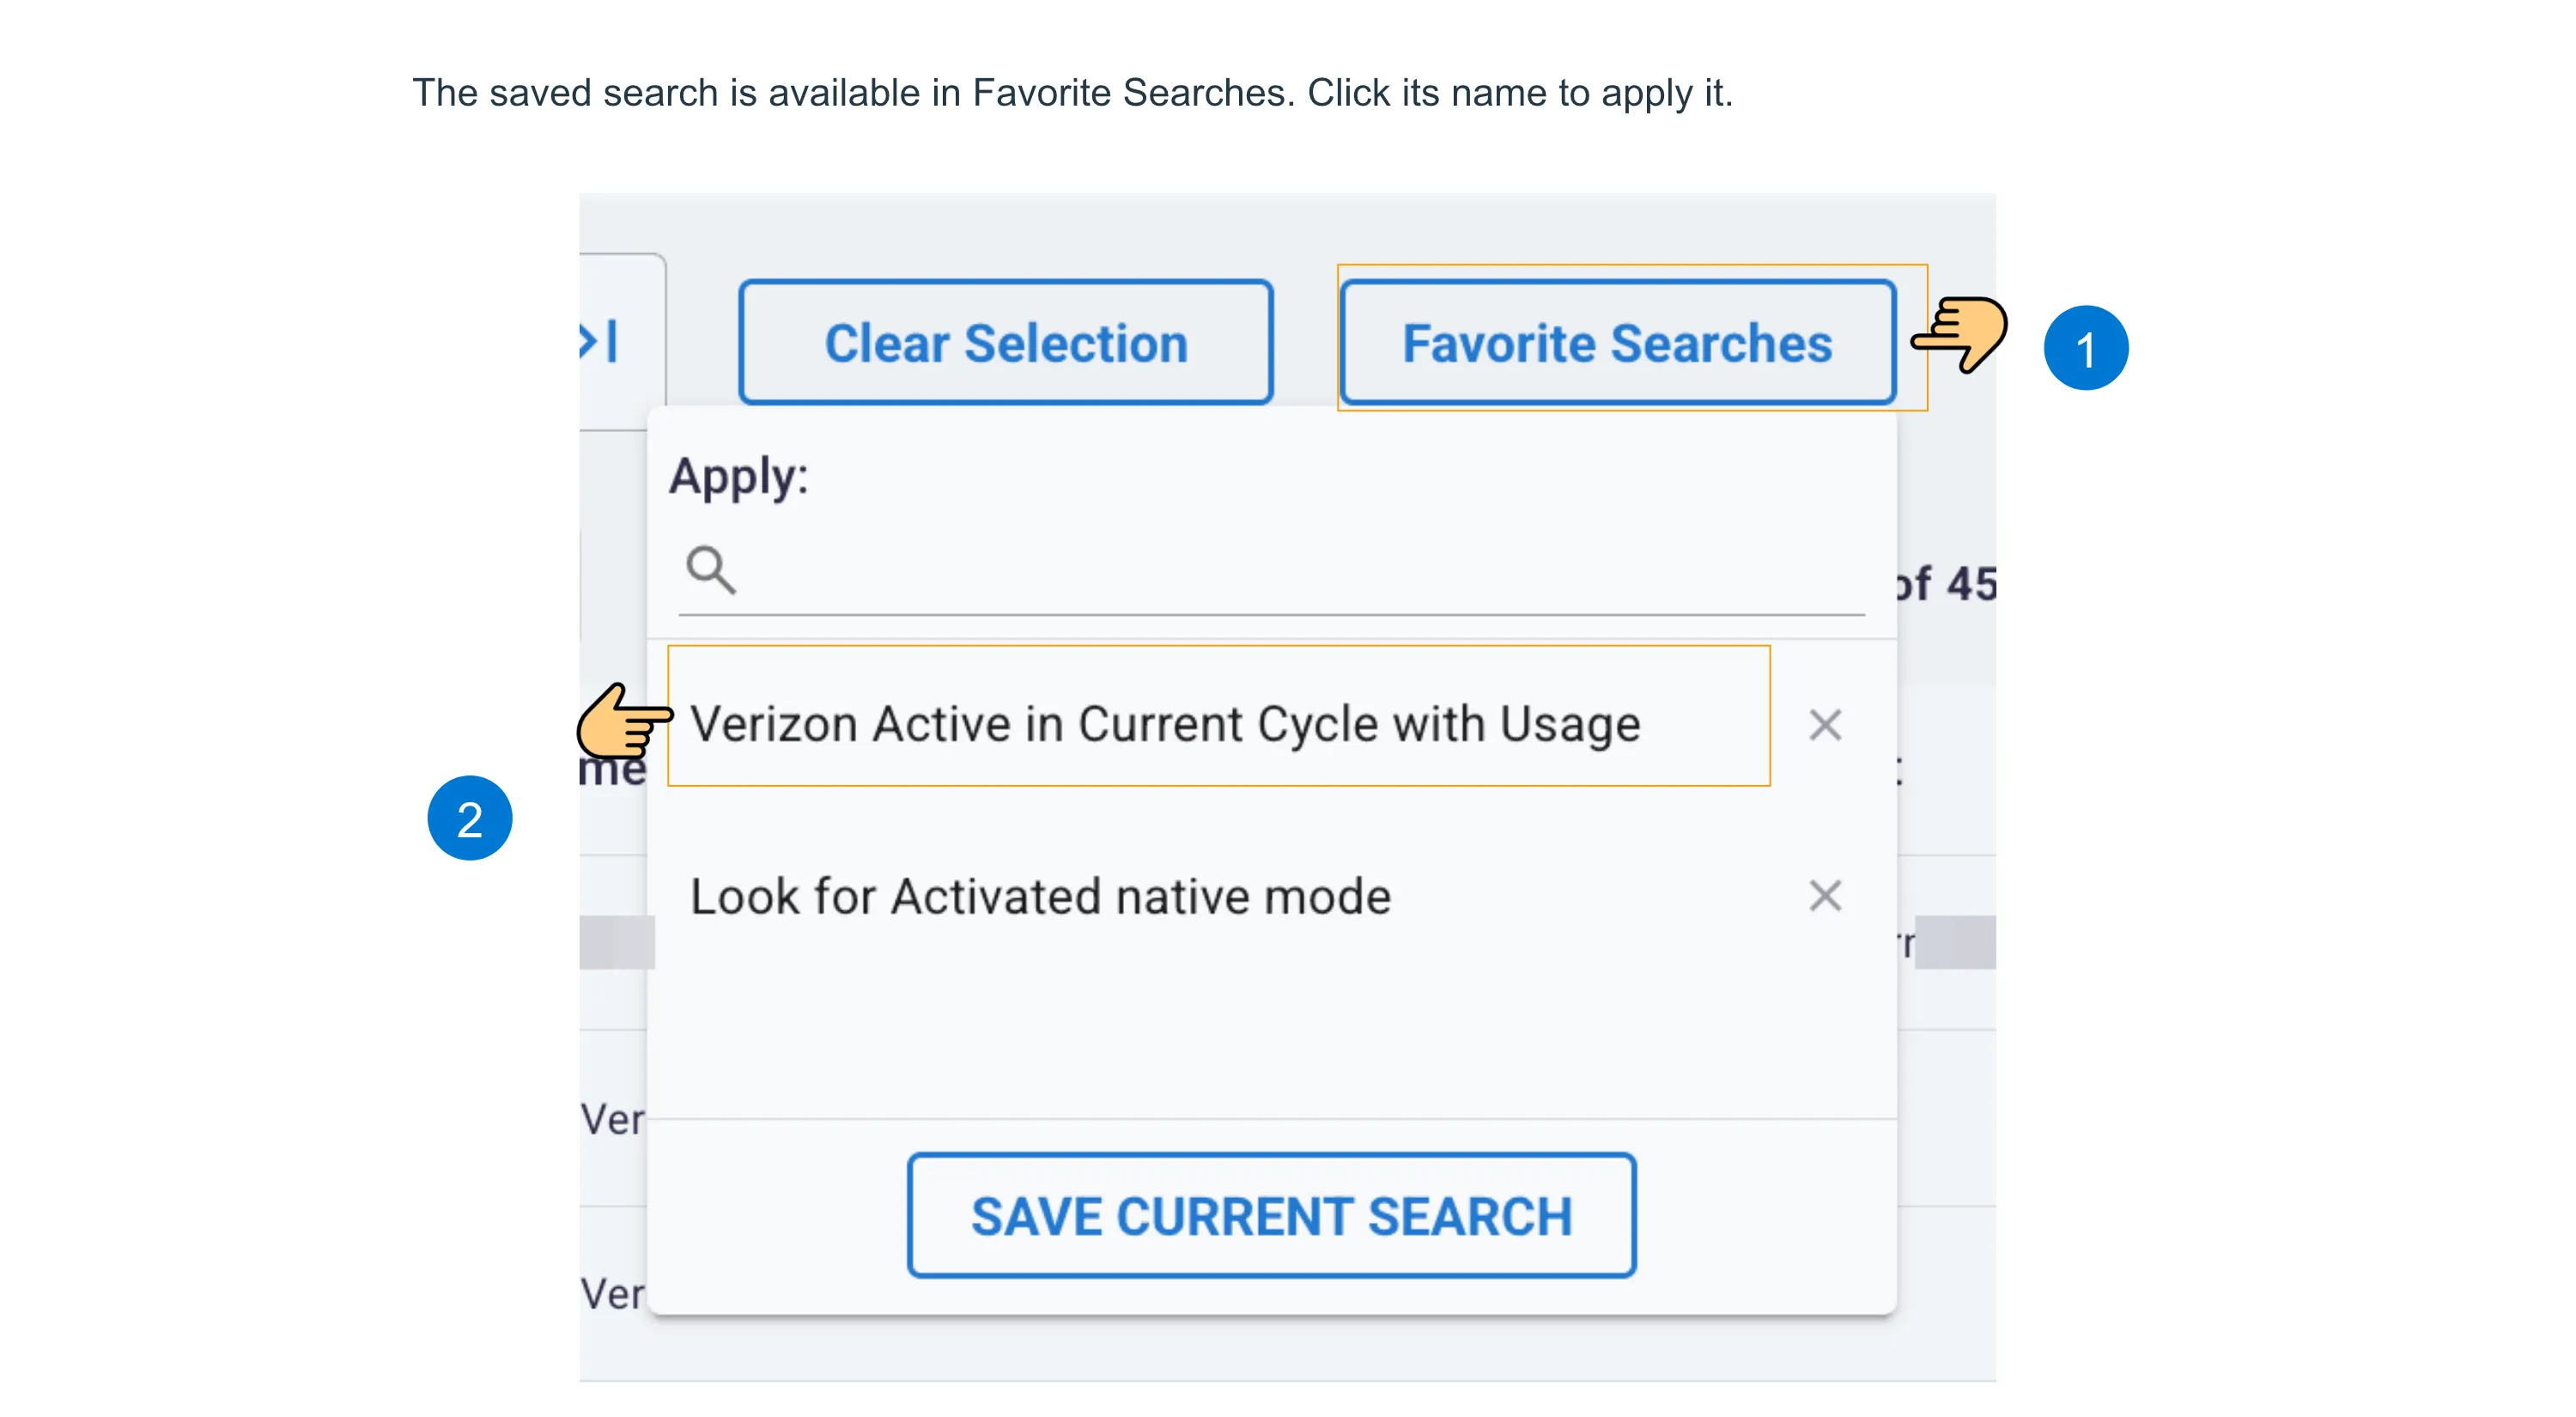
The next time the user opens Favorite Searches, the query will appear in the list:
9.2.7.2. Saving a Favorite Search from Advanced Search
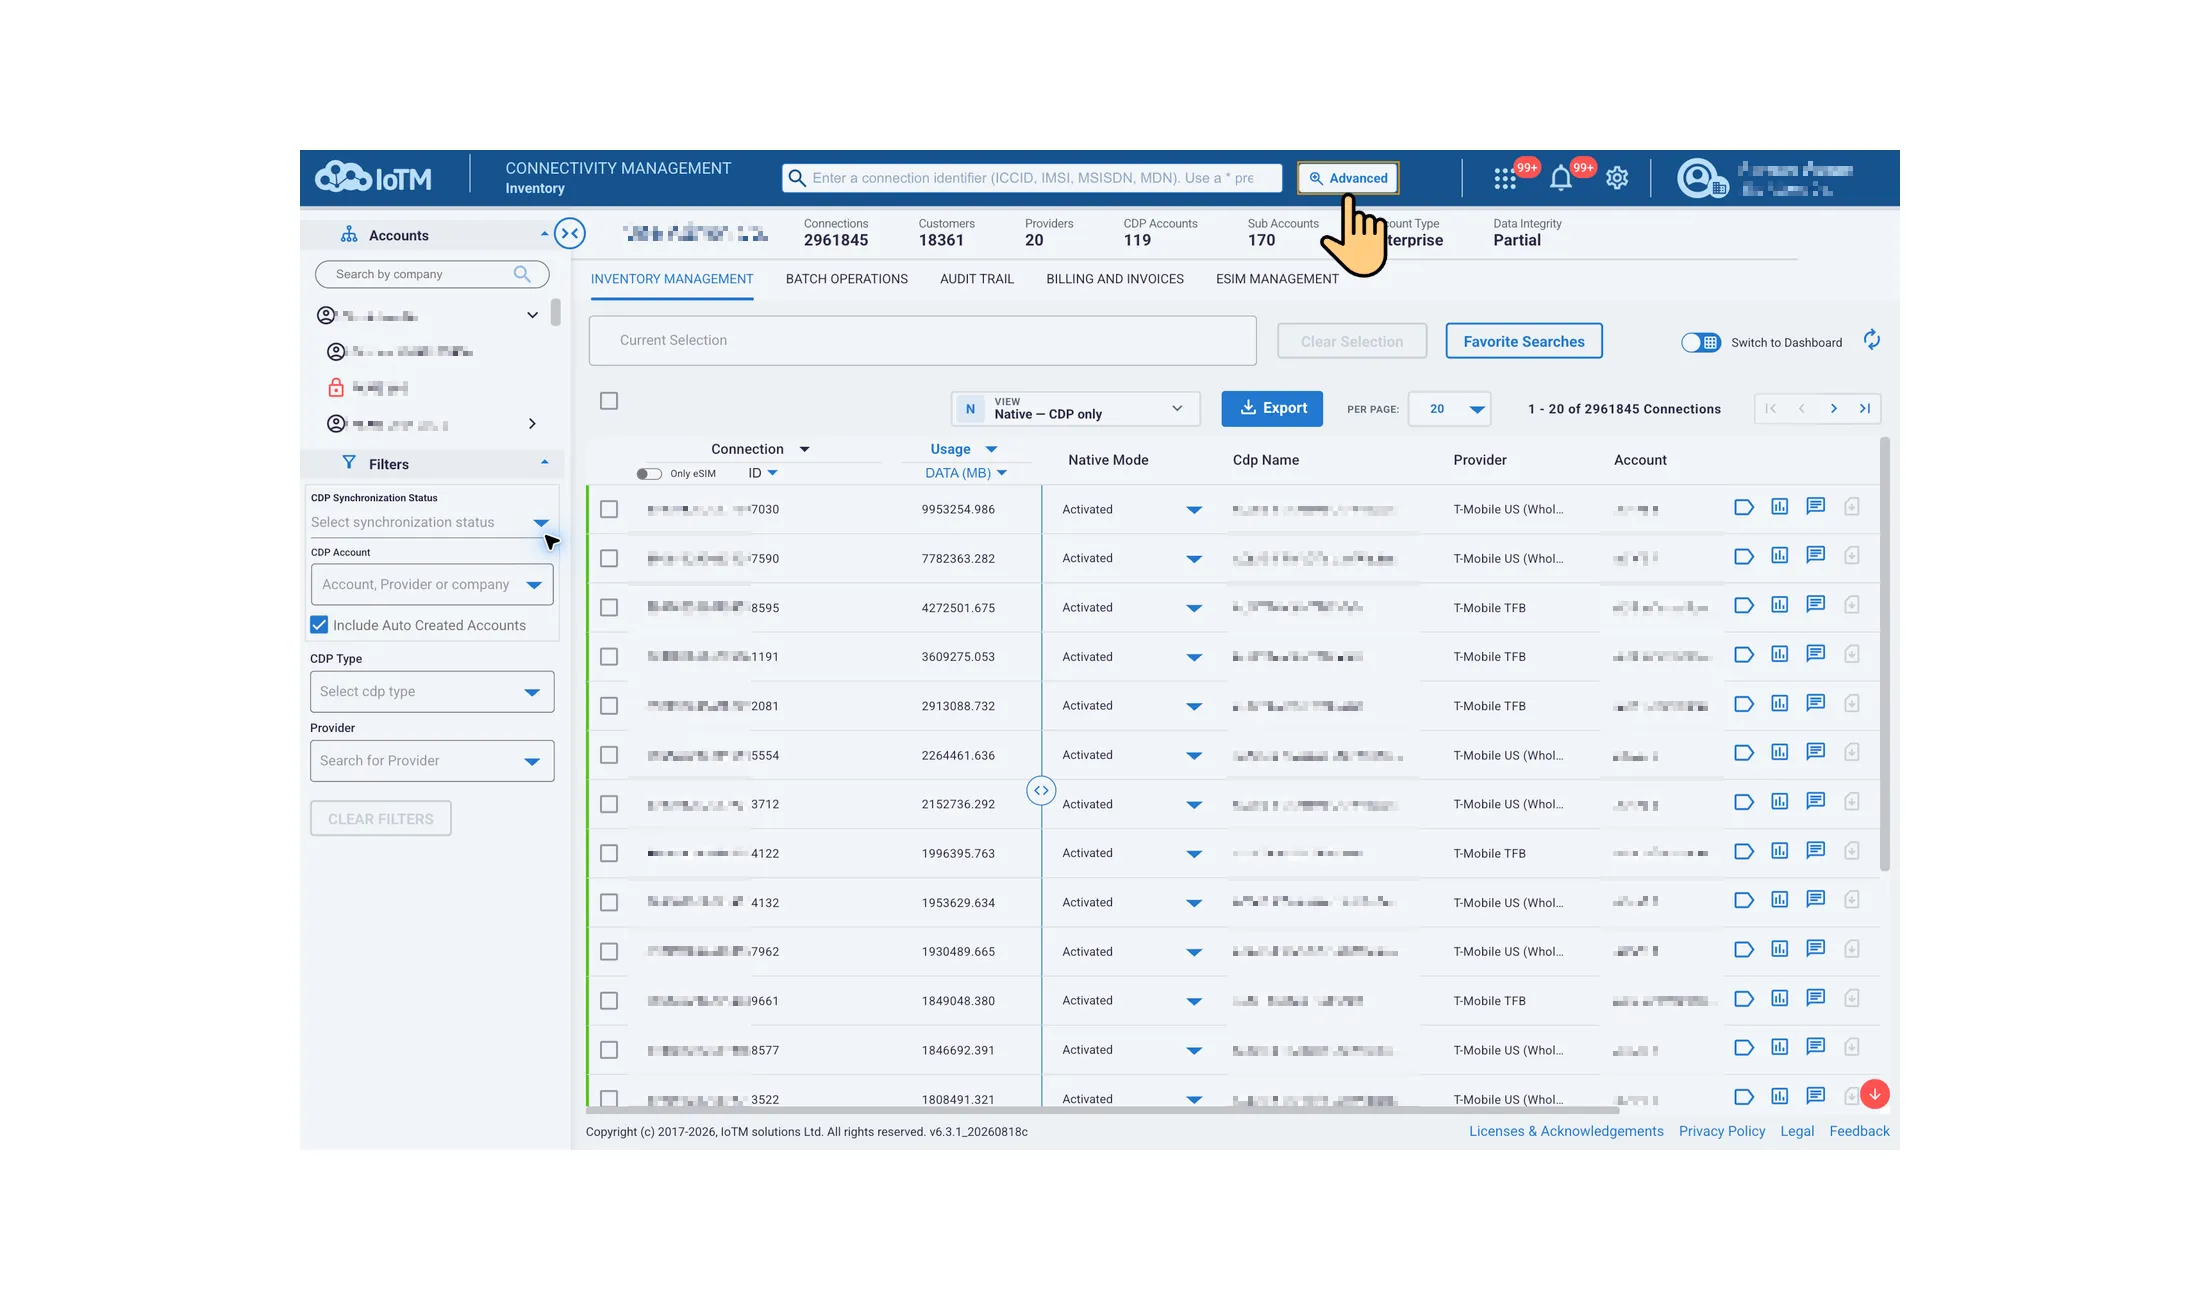
To access Advanced Search, click on the ‘Advanced’ button next to the search bar in Inventory Management:
Once the Advanced Search parameters are configured, there are two ways to bookmark a query. The first option is to click “Save Search” at the upper-right of the Advanced Search page, enter a name, and click SAVE. The screenshot below shows the name-entry dialog after the first click:
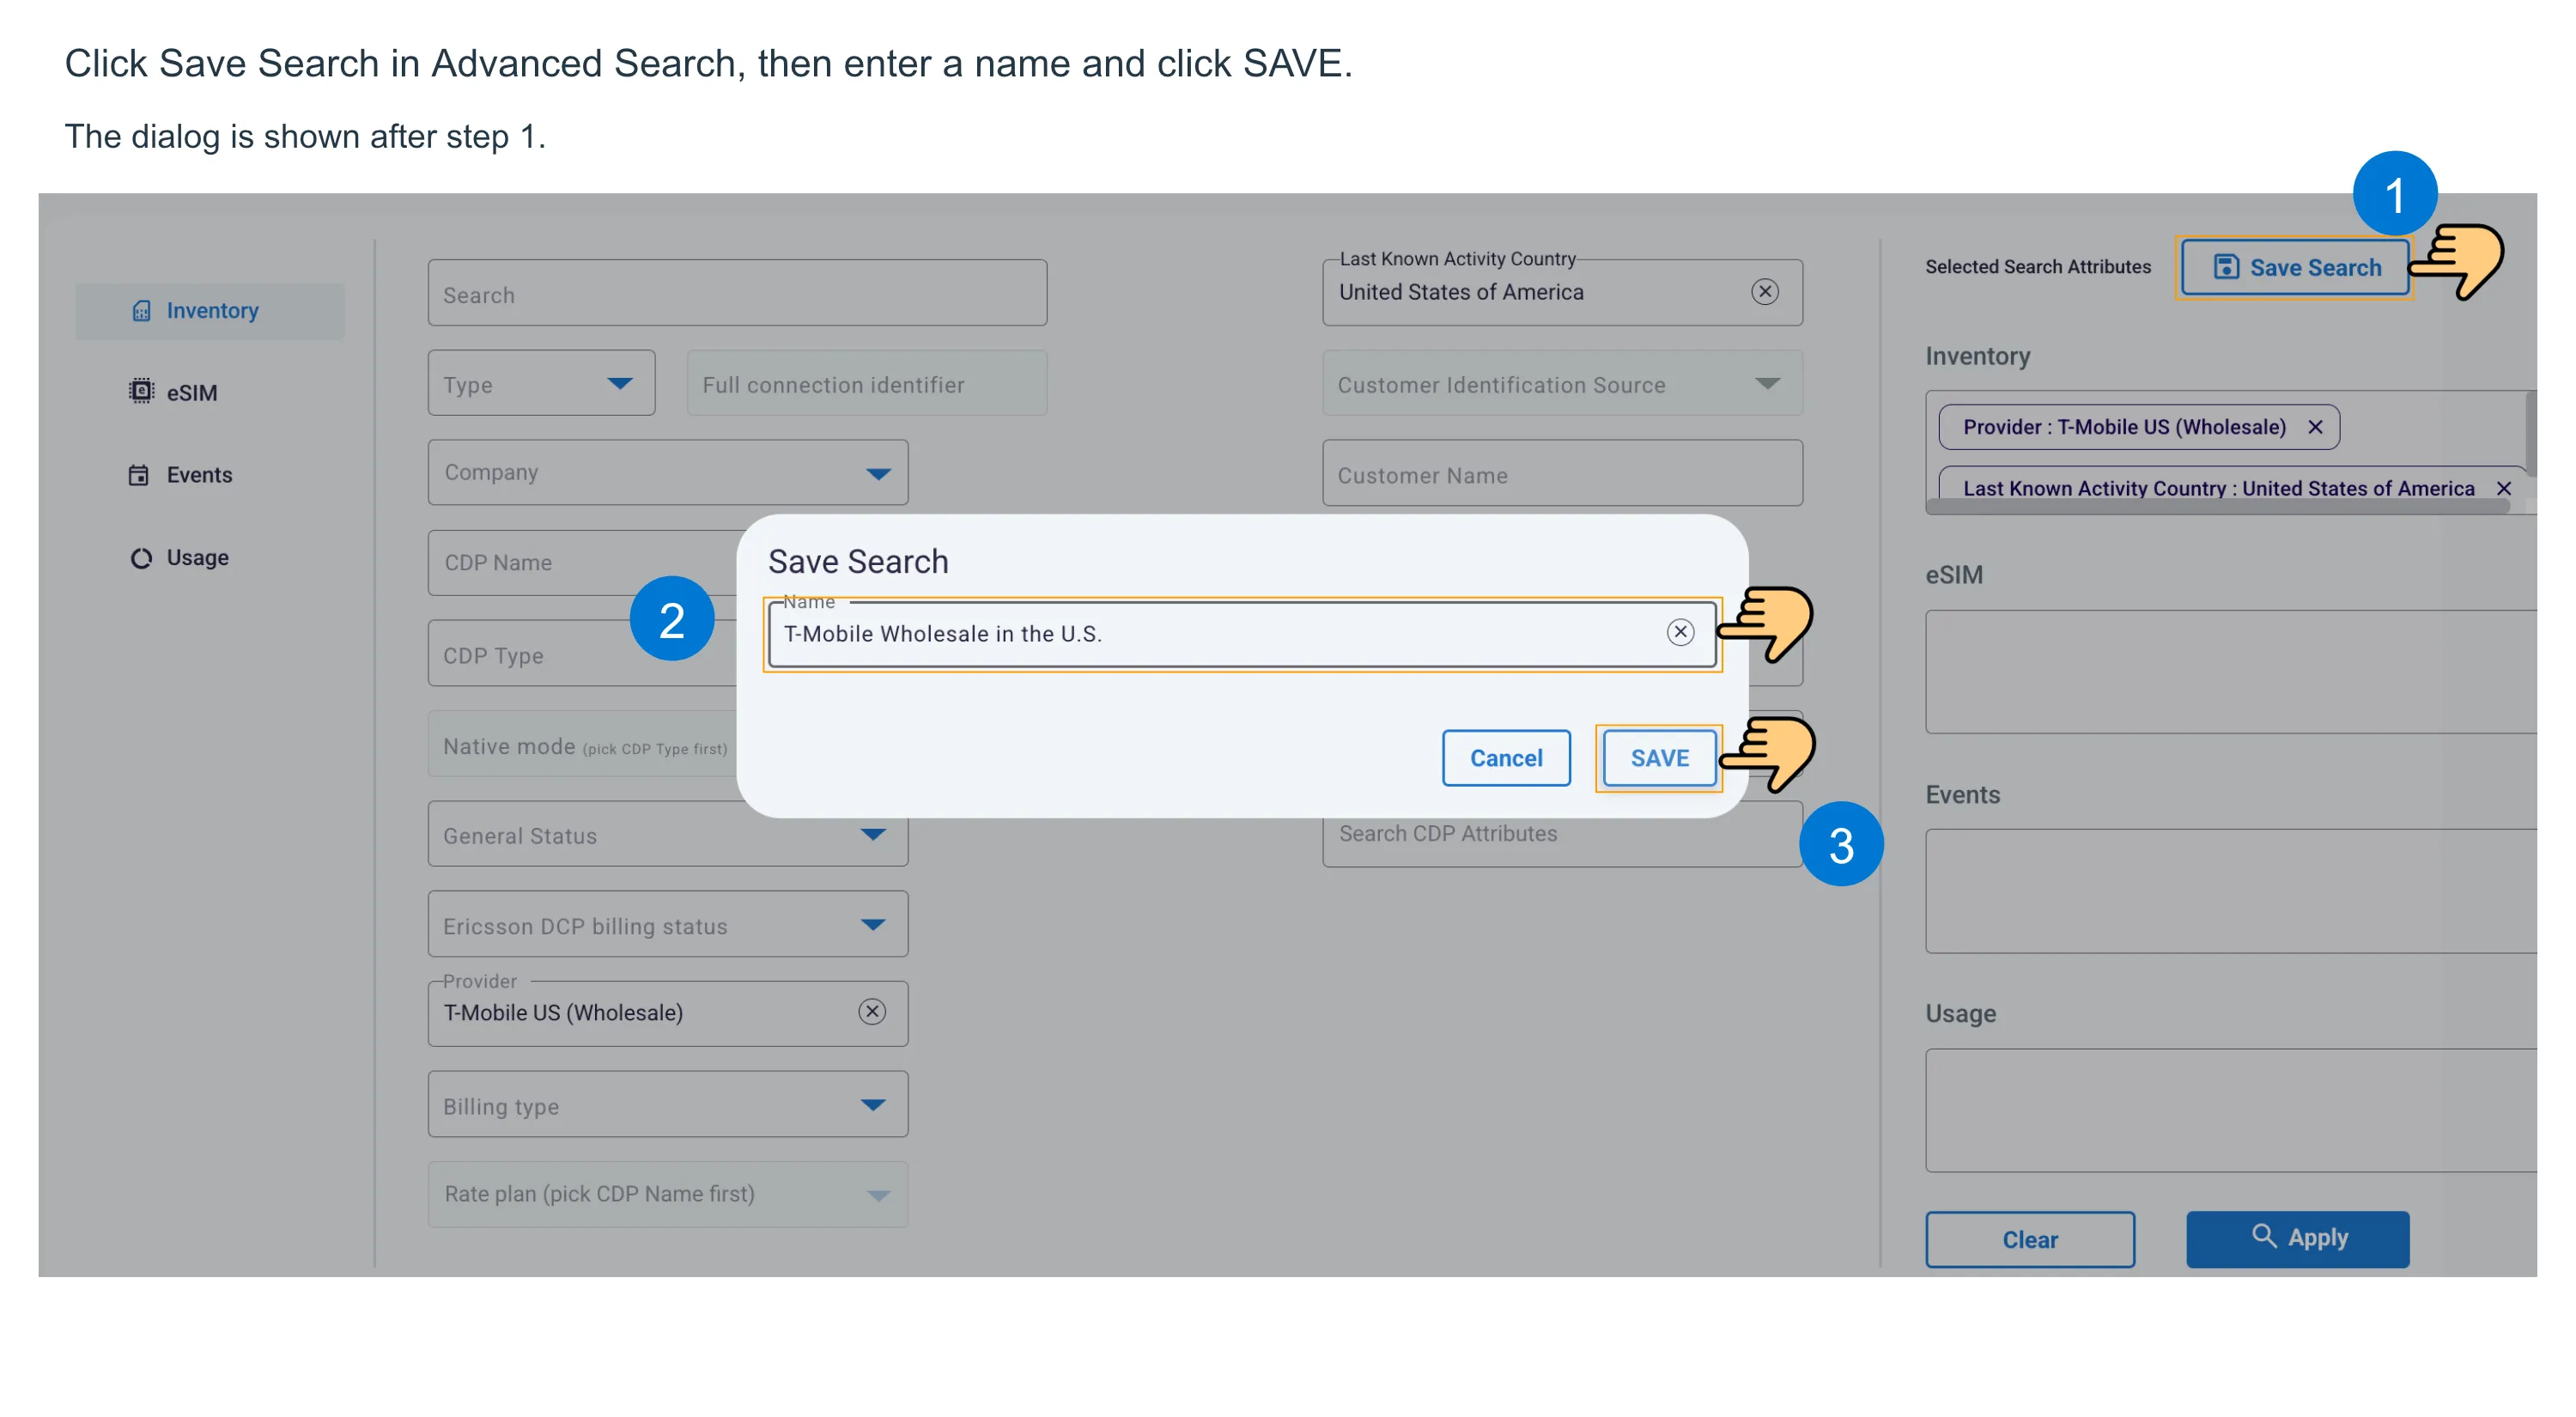
The second option is to click Apply to run the search first. Once back on the Grid View page with the displayed search results, bookmark the query using Favorite Searches > SAVE CURRENT SEARCH. Enter a name and click SAVE, as for a regular Omni-search:
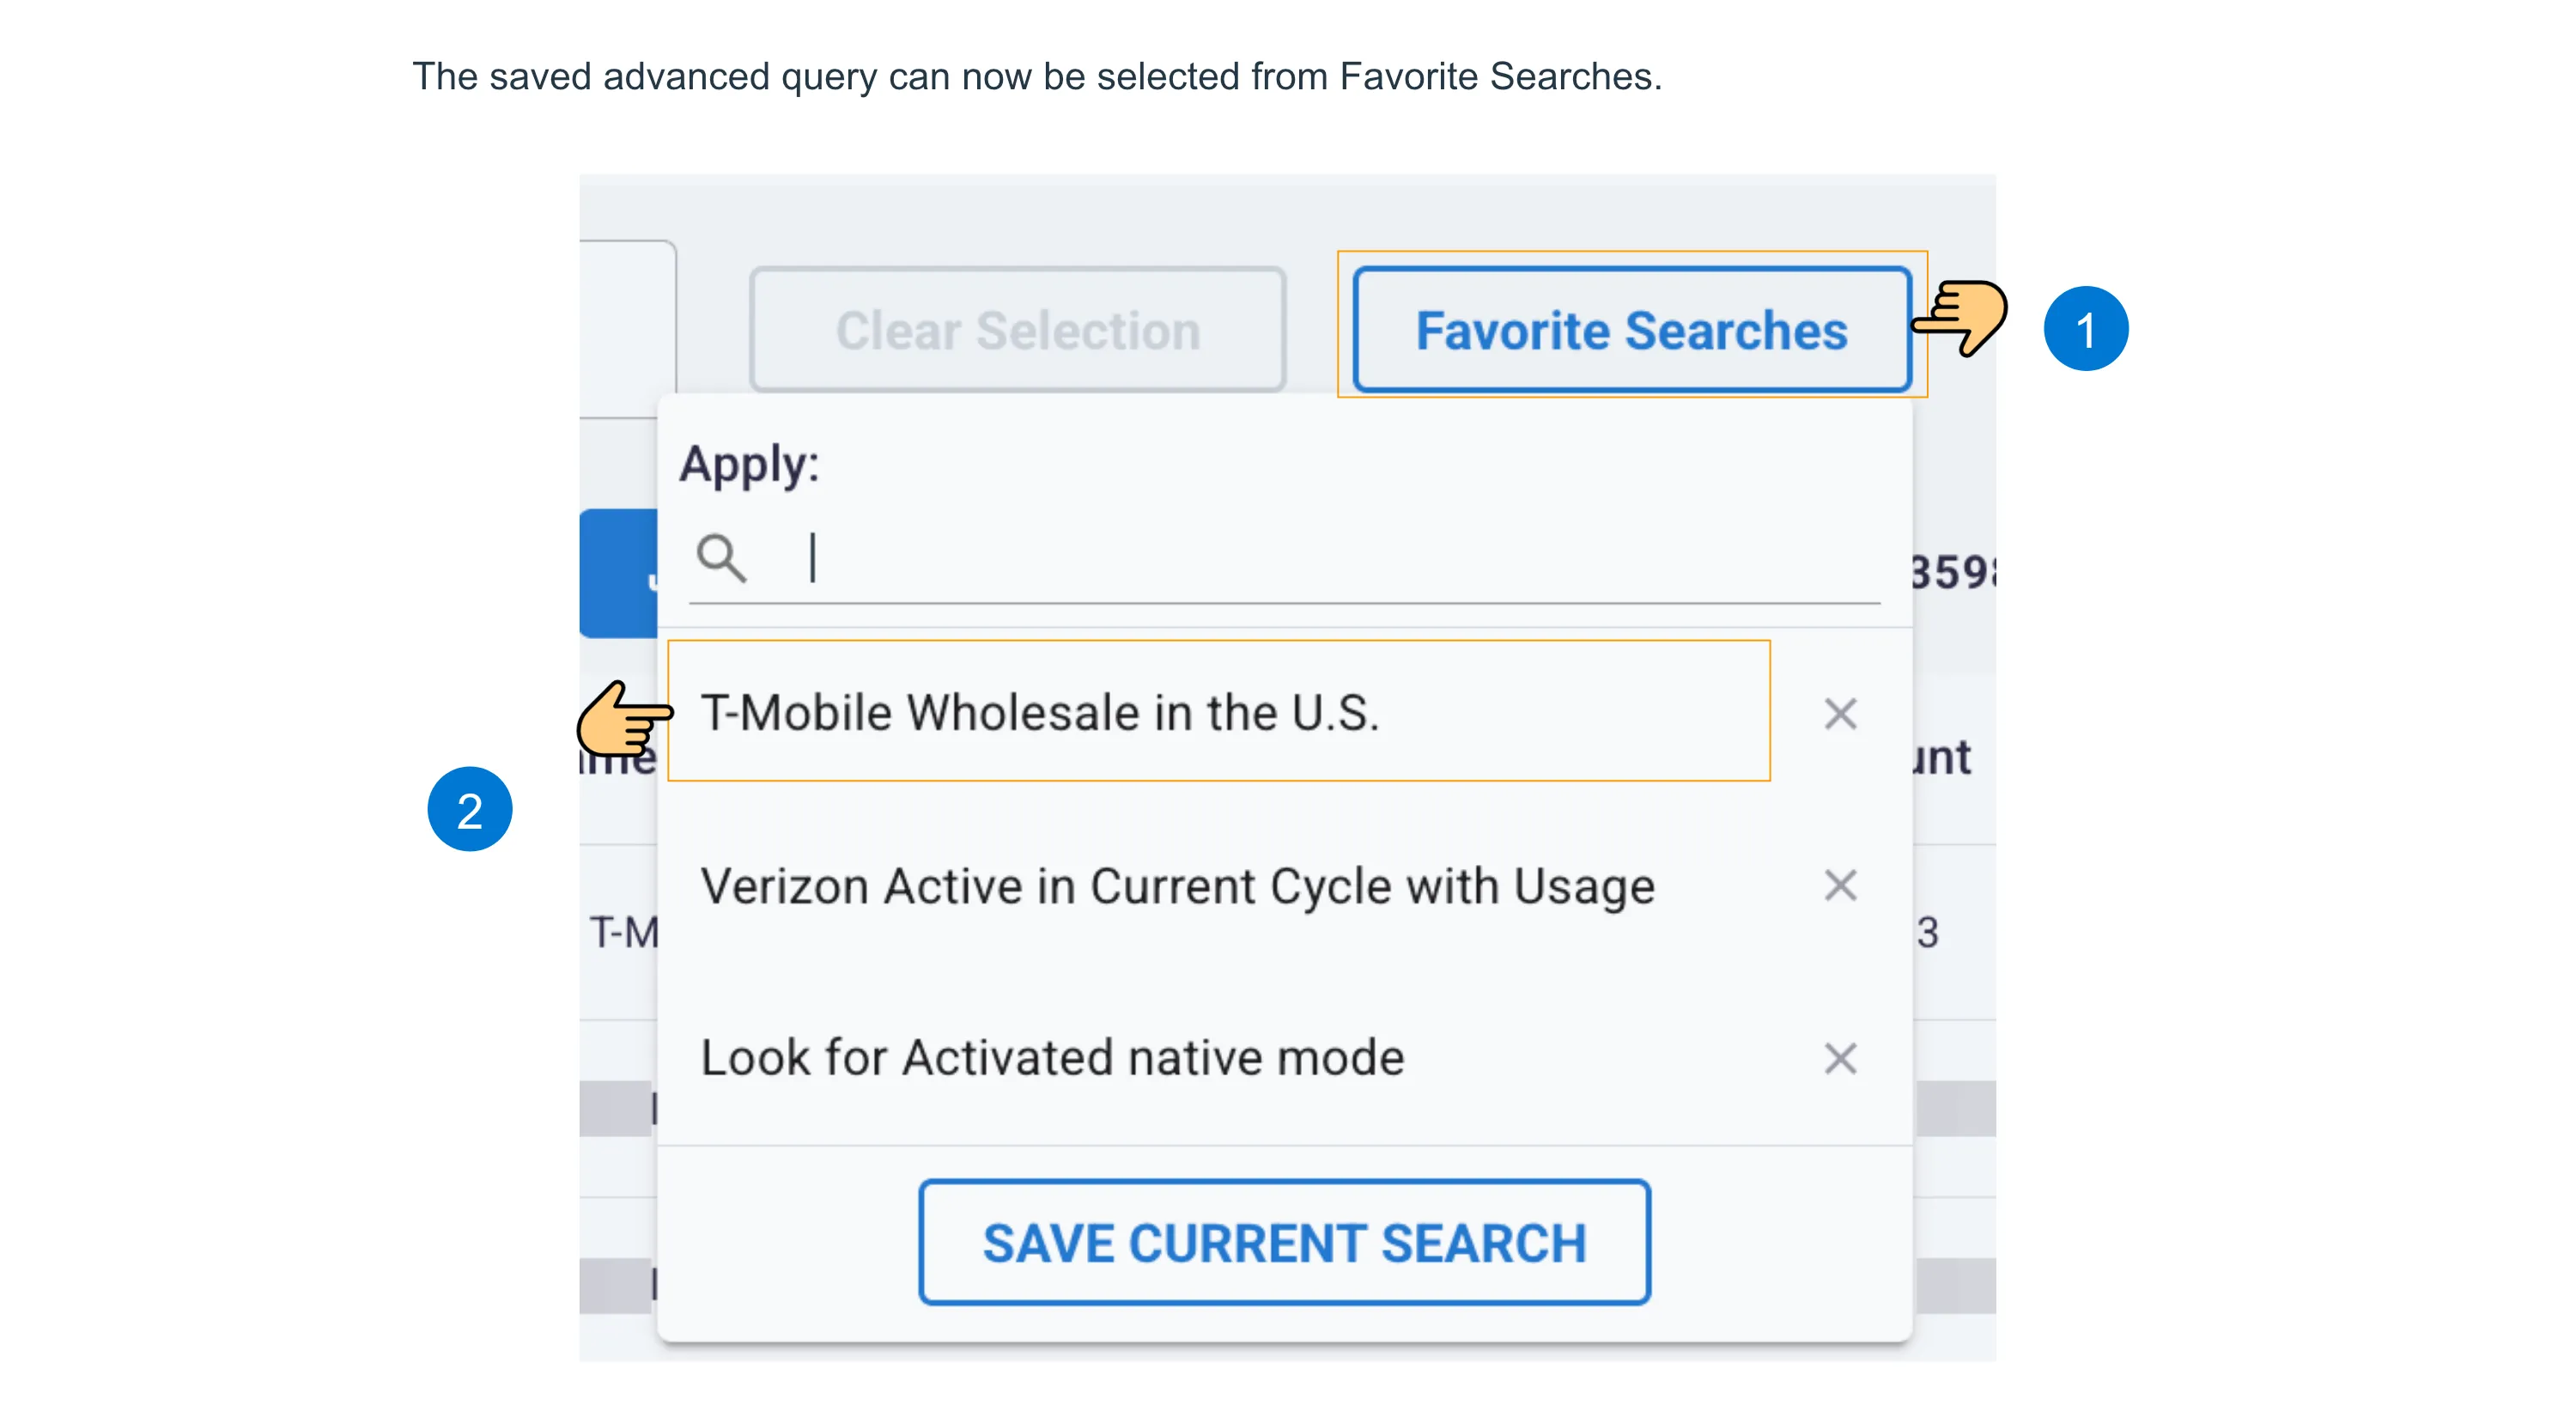
The next time the user opens Favorite Searches, the newly added query will appear in the list:
9.2.7.3. Deleting Favorite Searches
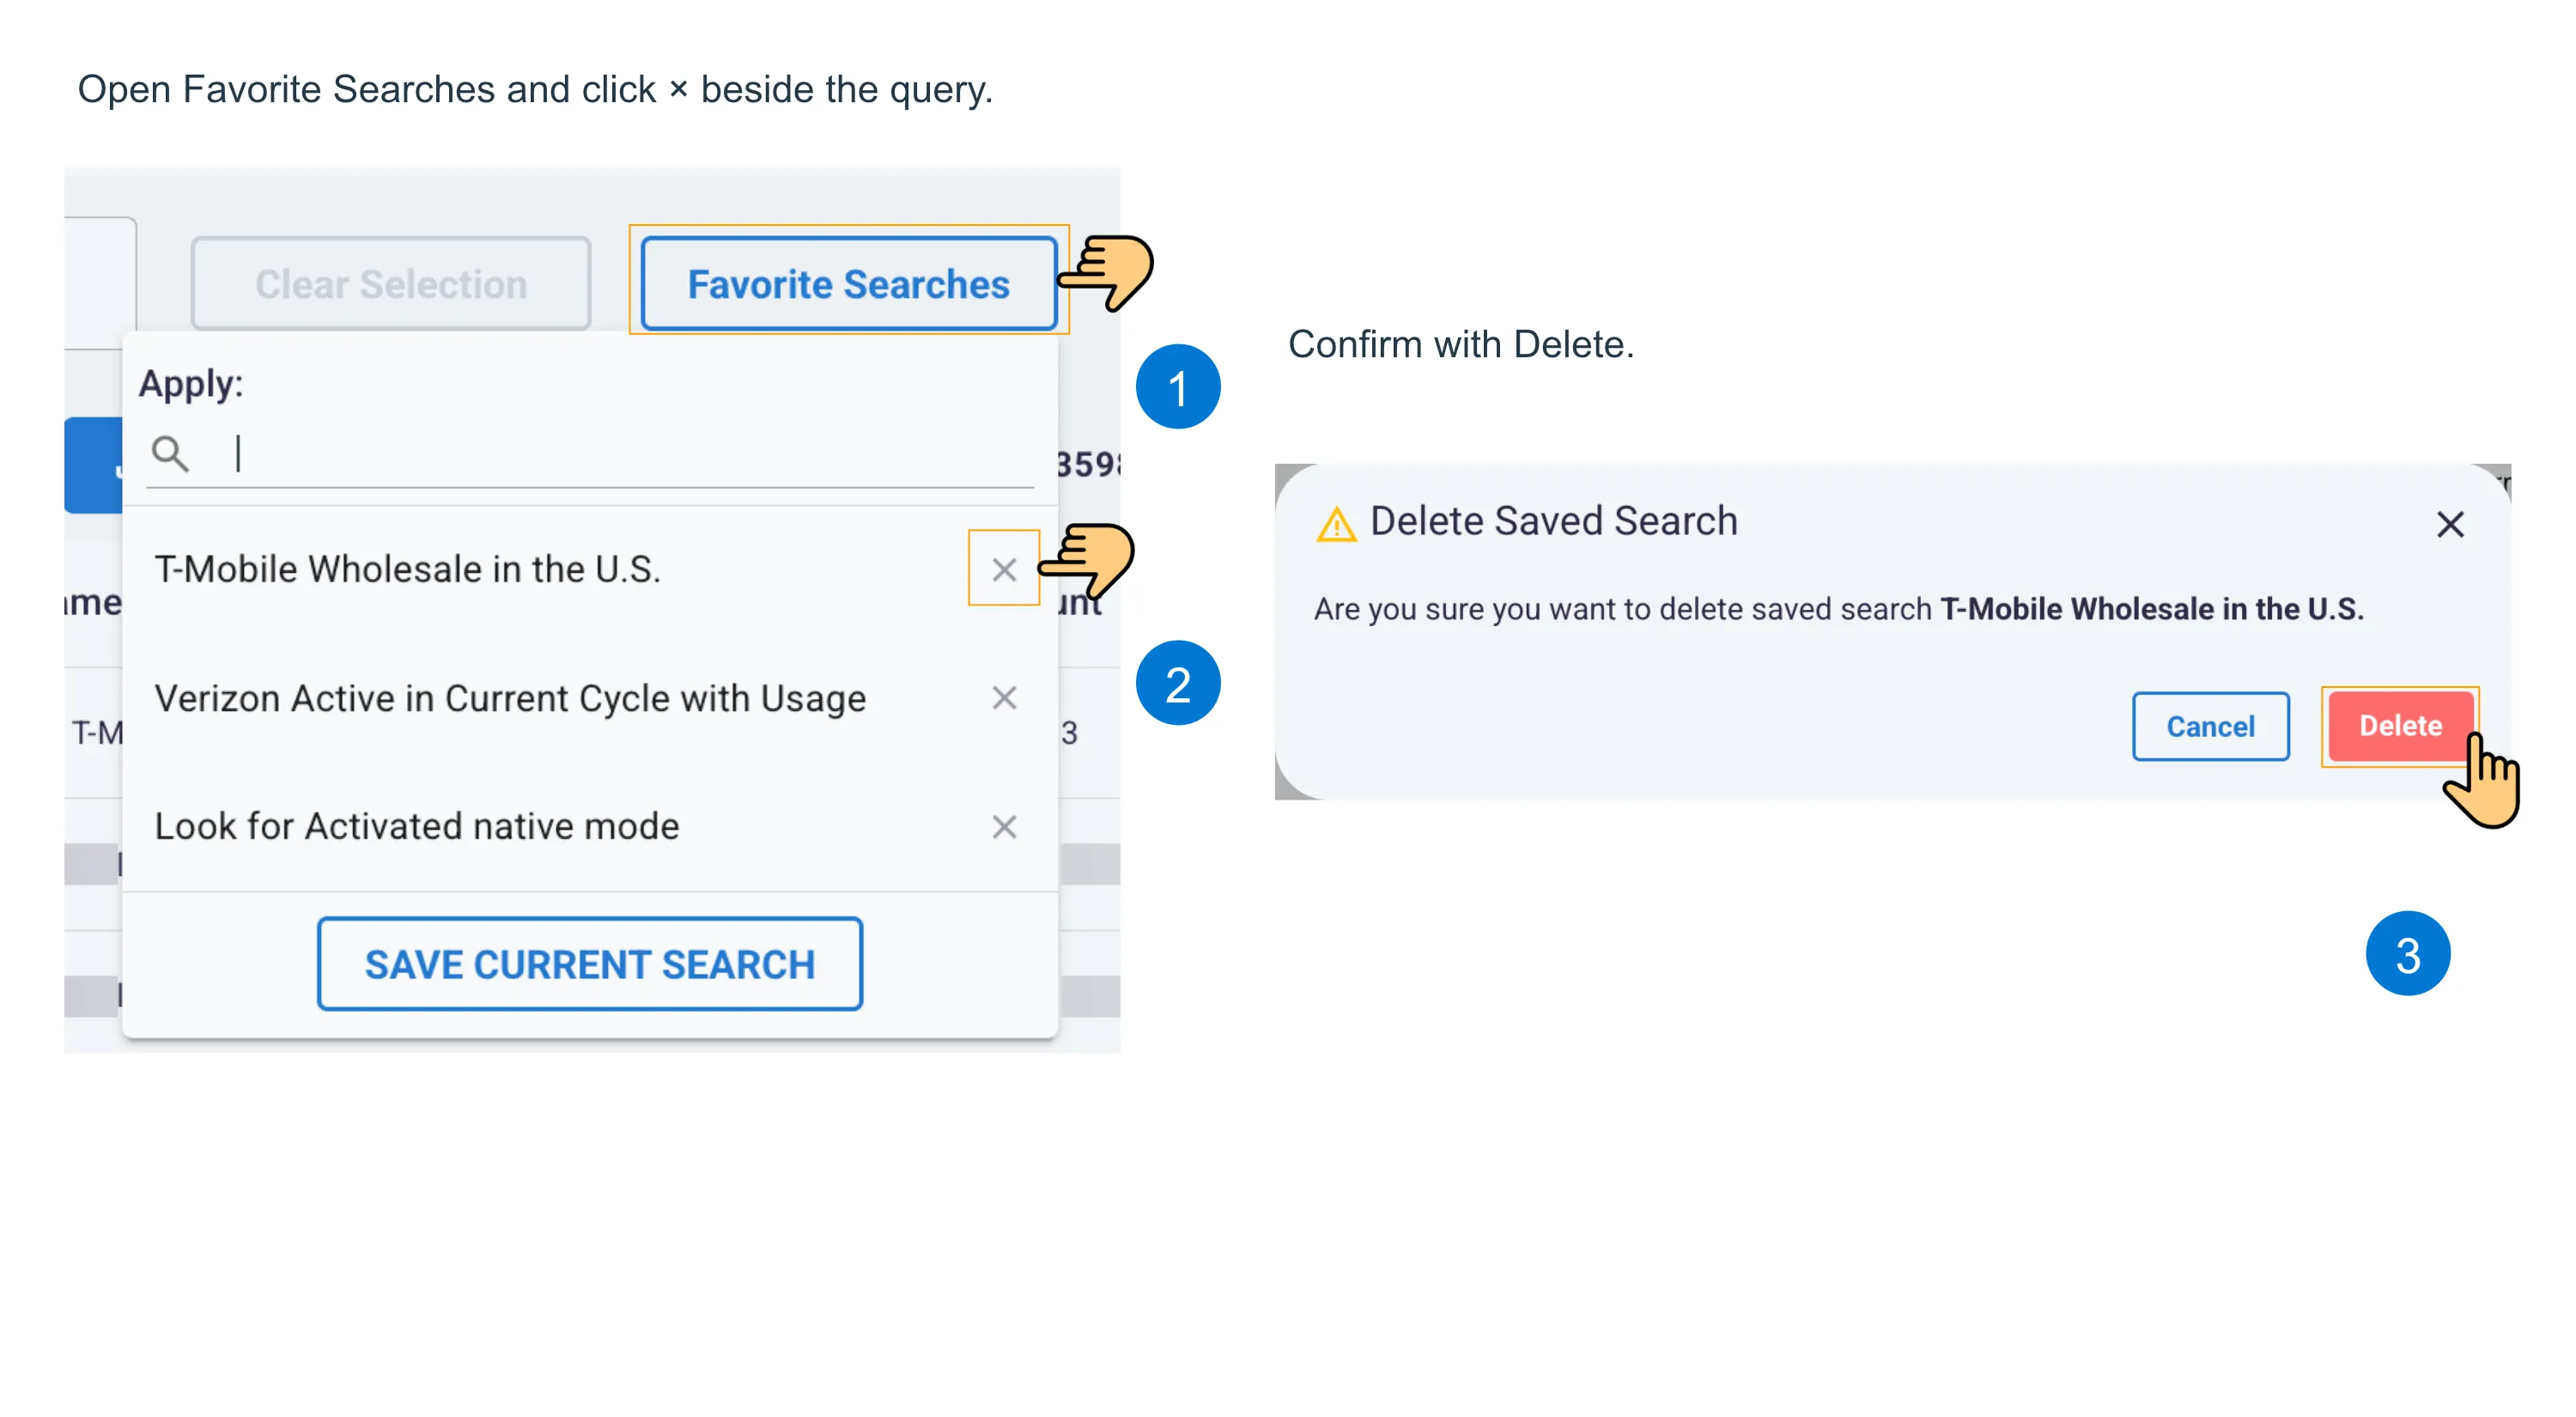
To delete a favorite search, the user needs to access favorite searches and to click on the X icon next to the query they wish to delete. They will be prompted to confirm the action.
9.2.7. Exporting Data
Export the contents of a data grid as a Microsoft Excel (XLSX) file or a zipped CSV file by clicking the Export button above the grid and choosing the required format.
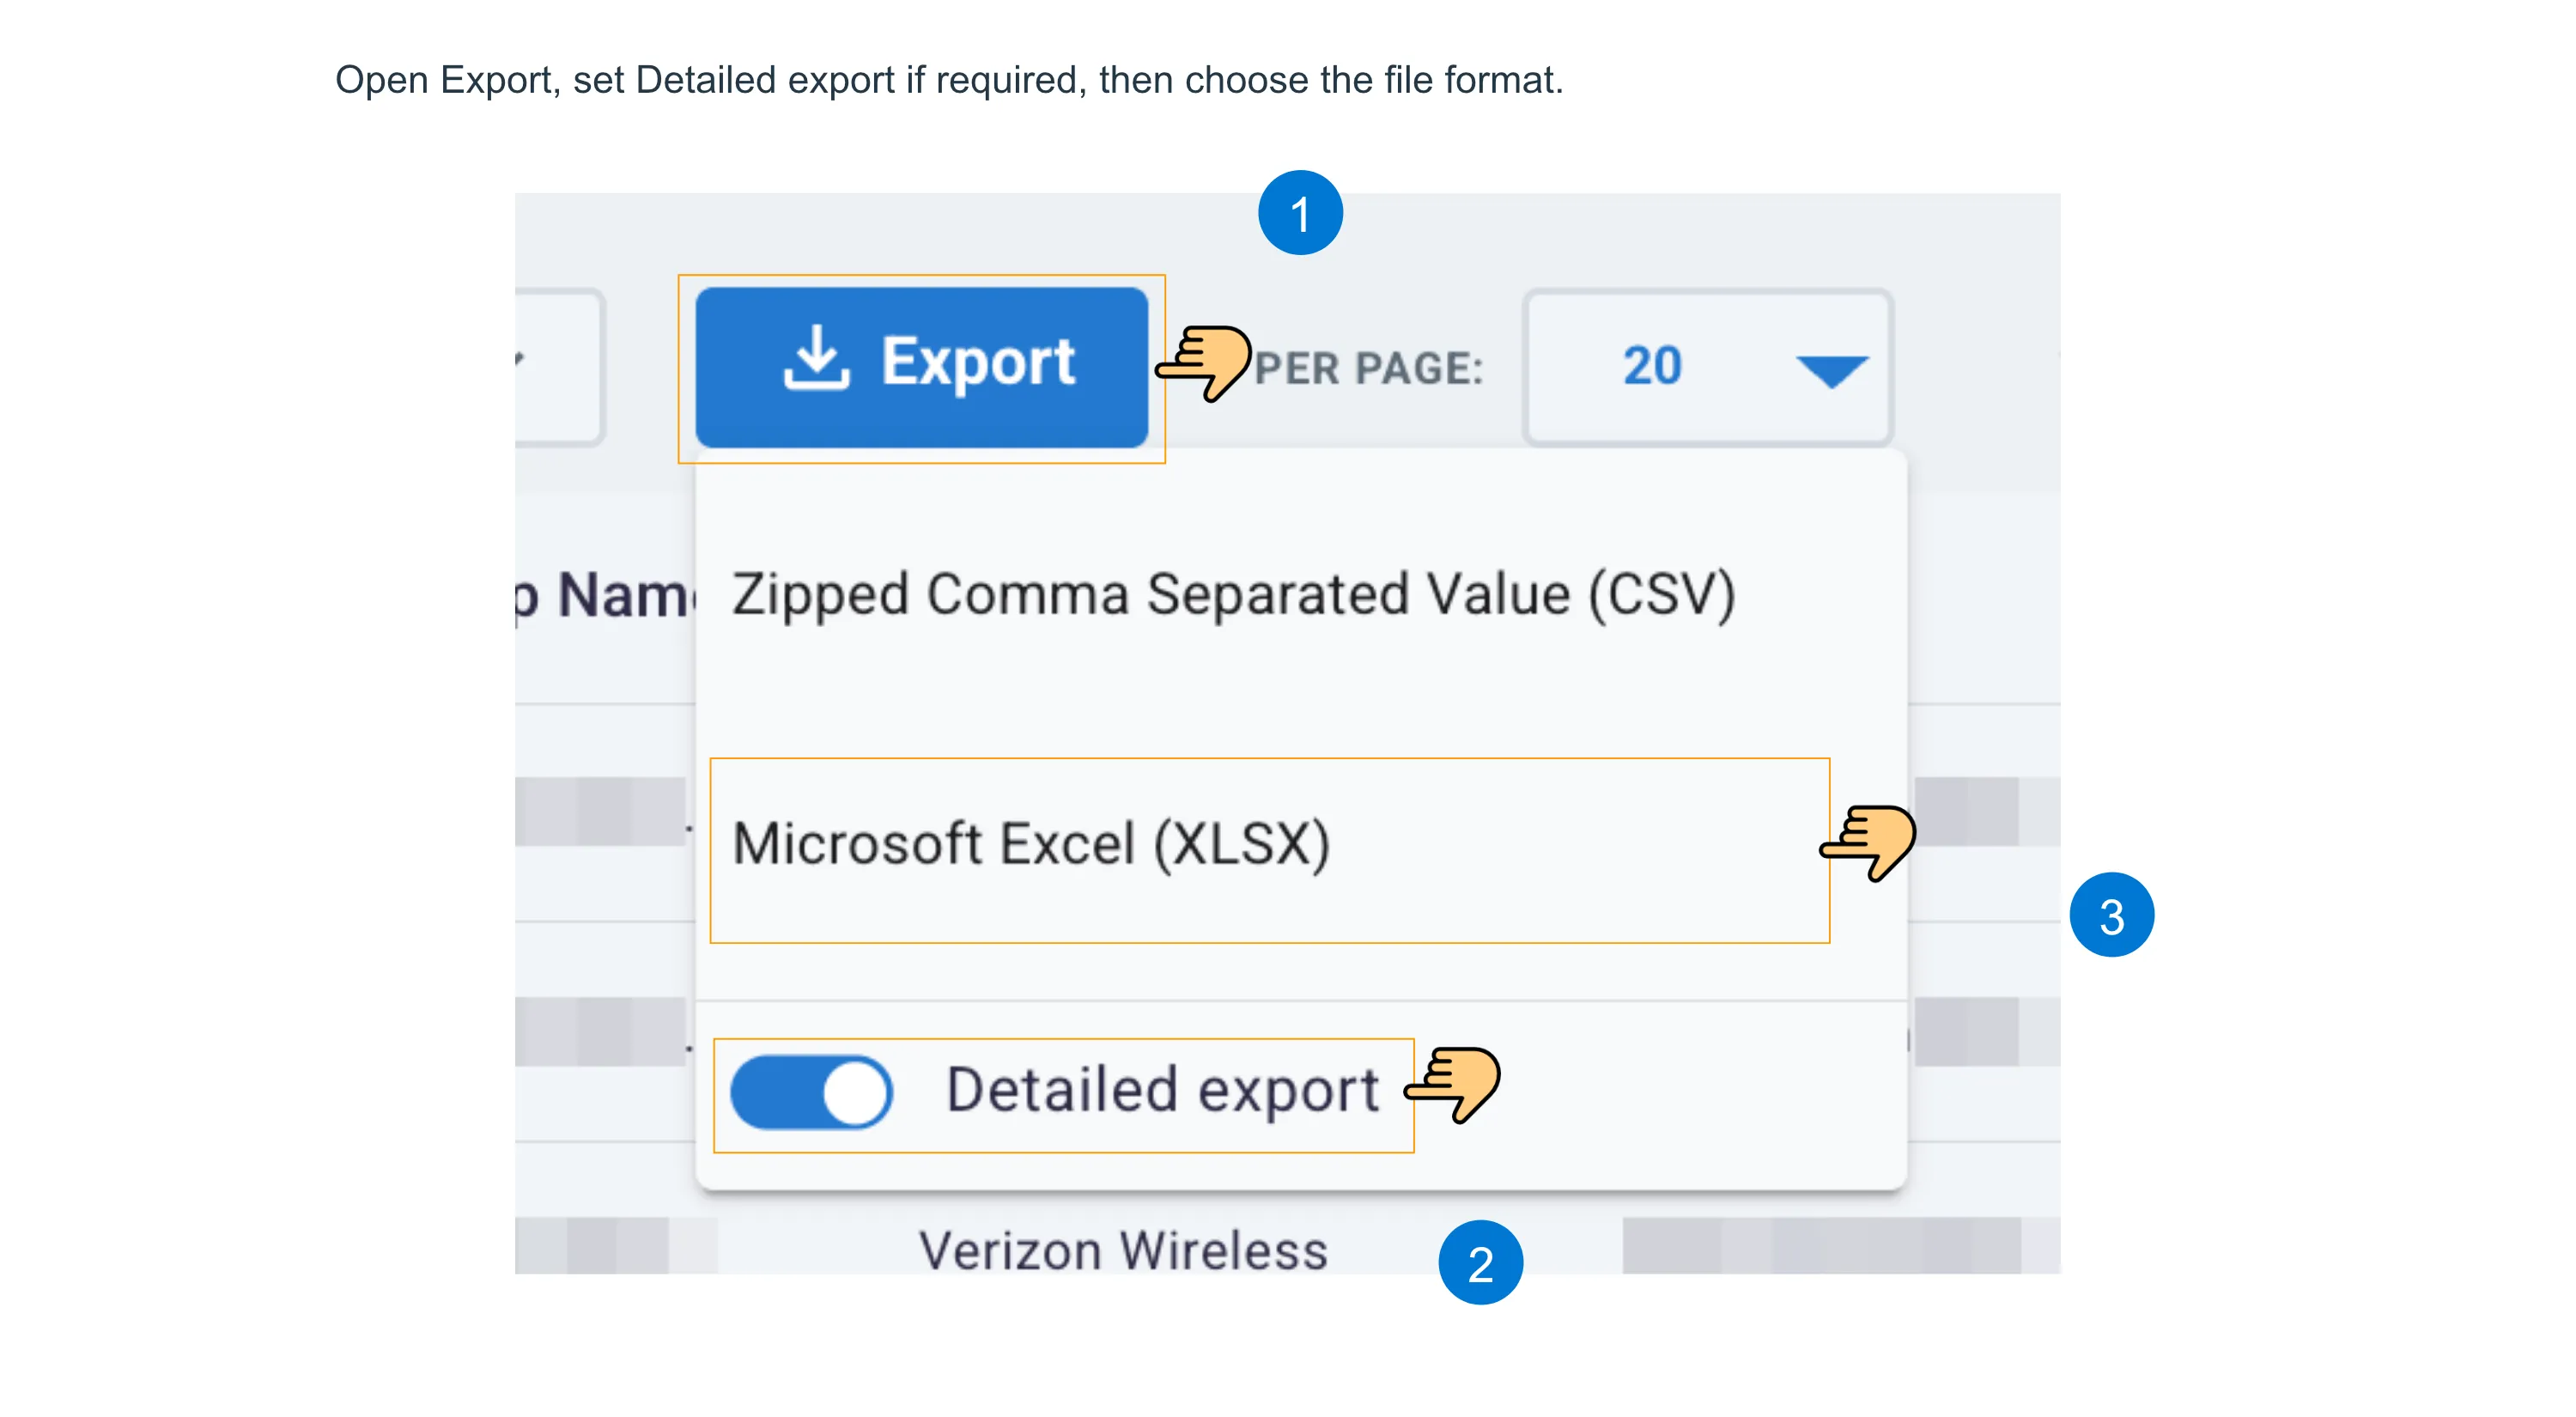
Export menu: select Detailed export if required, then choose a file format.
The result of this export is a list of connections and additional data regarding these connections that pertain to the specific grid page from which the export was executed. By default, the export scope is the entire population relevant to the search. It is also possible to export only data relating to handpicked selected connections from the current in focus page by checking ‘Export only selected connections’. Enabling the ‘Detailed export’ toggle will result in a report with numerous additional fields with more details about the connections than can be seen on the grid page (even if expanded).
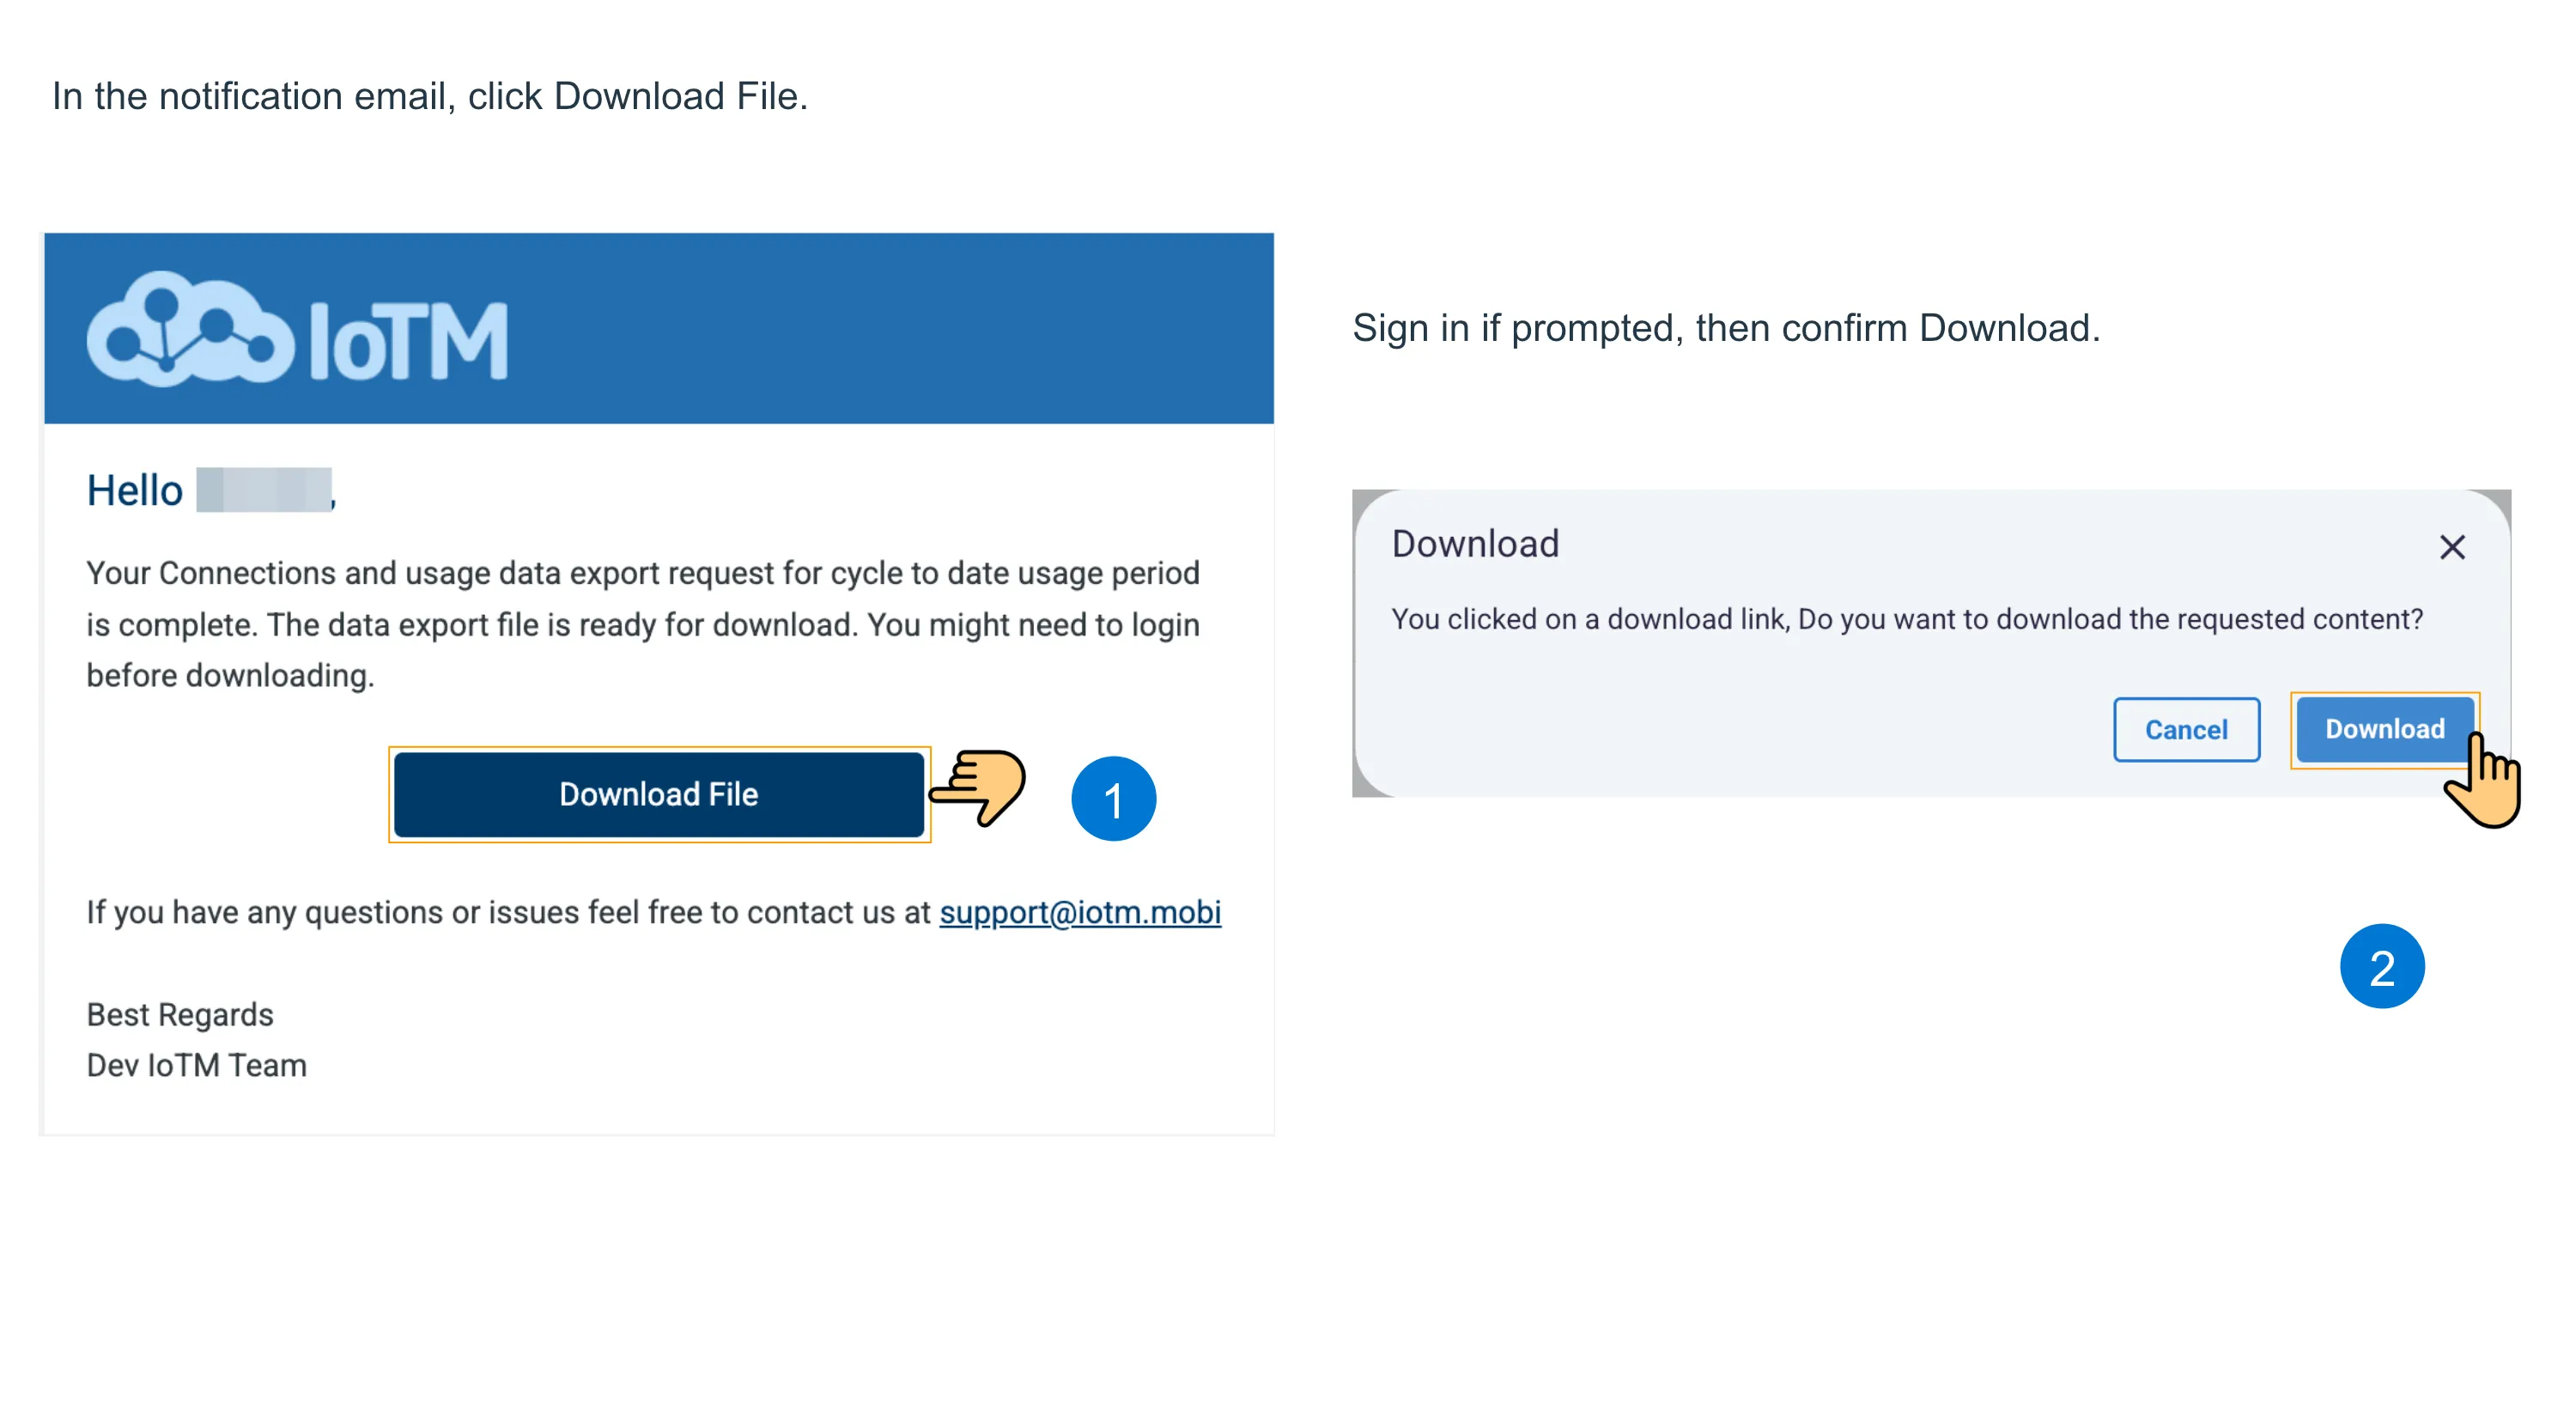
Note: In case a selection result set is too big for immediate download, upon pressing the desired file format the user will be notified that they will receive an email containing the download link. After pressing the link in the email, the user will be redirected to the platform and asked to confirm the download action: