Native Mode Changes
10.1.1. Selectively Changing Single Connection Native Mode From The Active Page
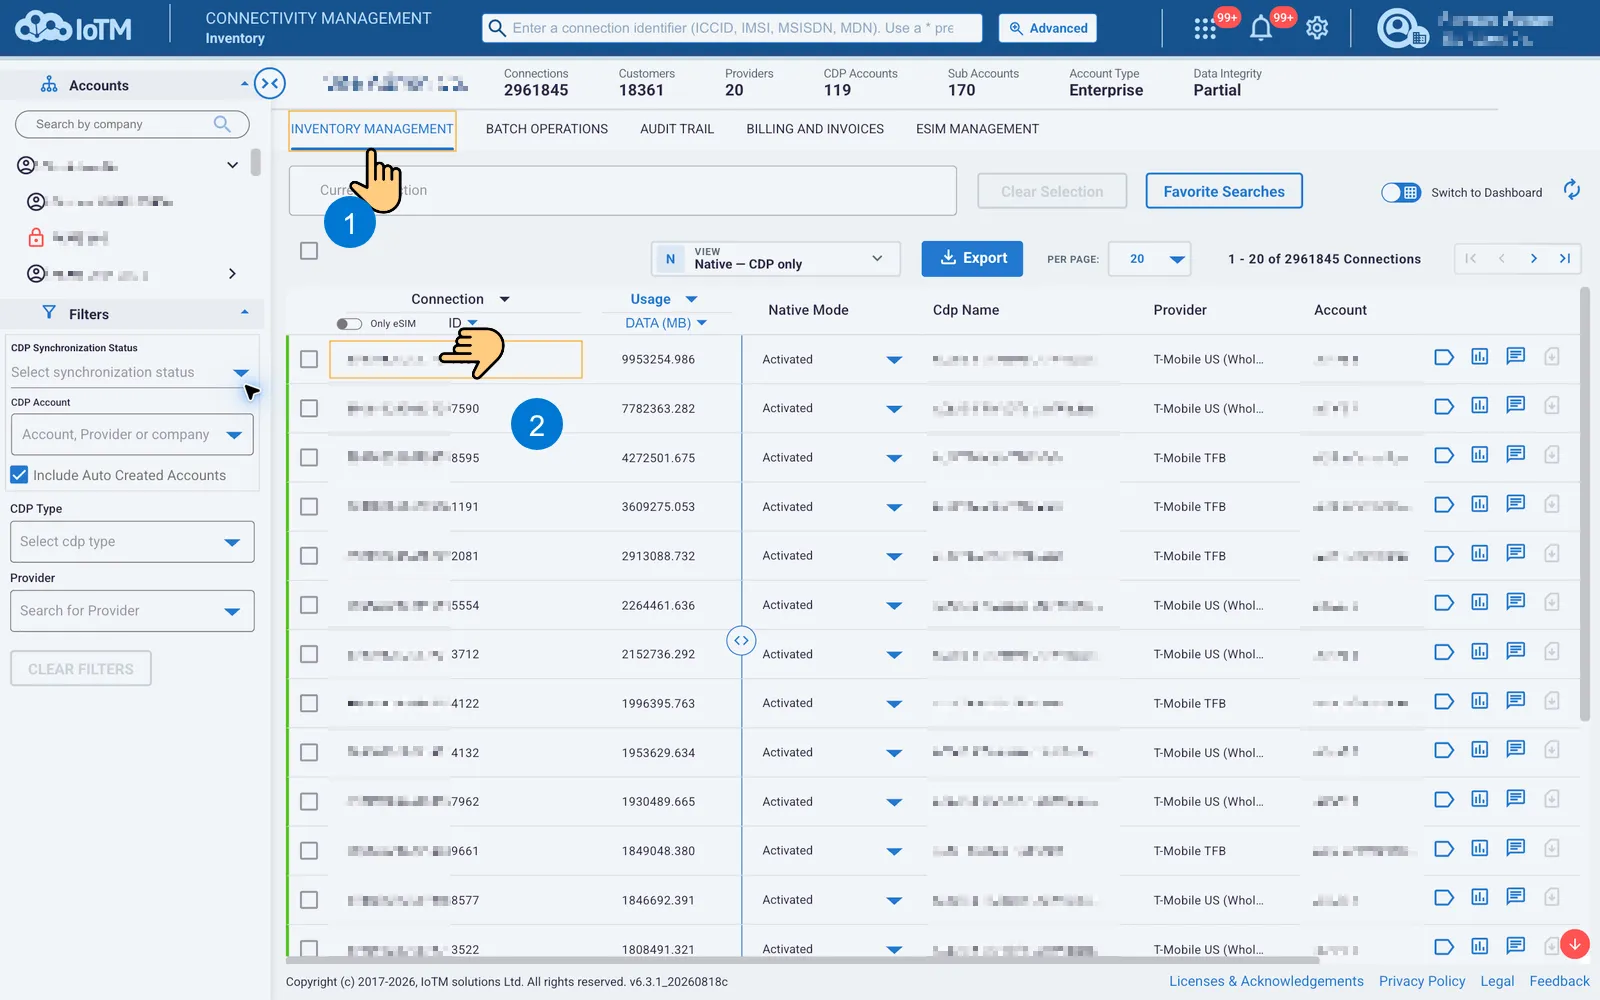
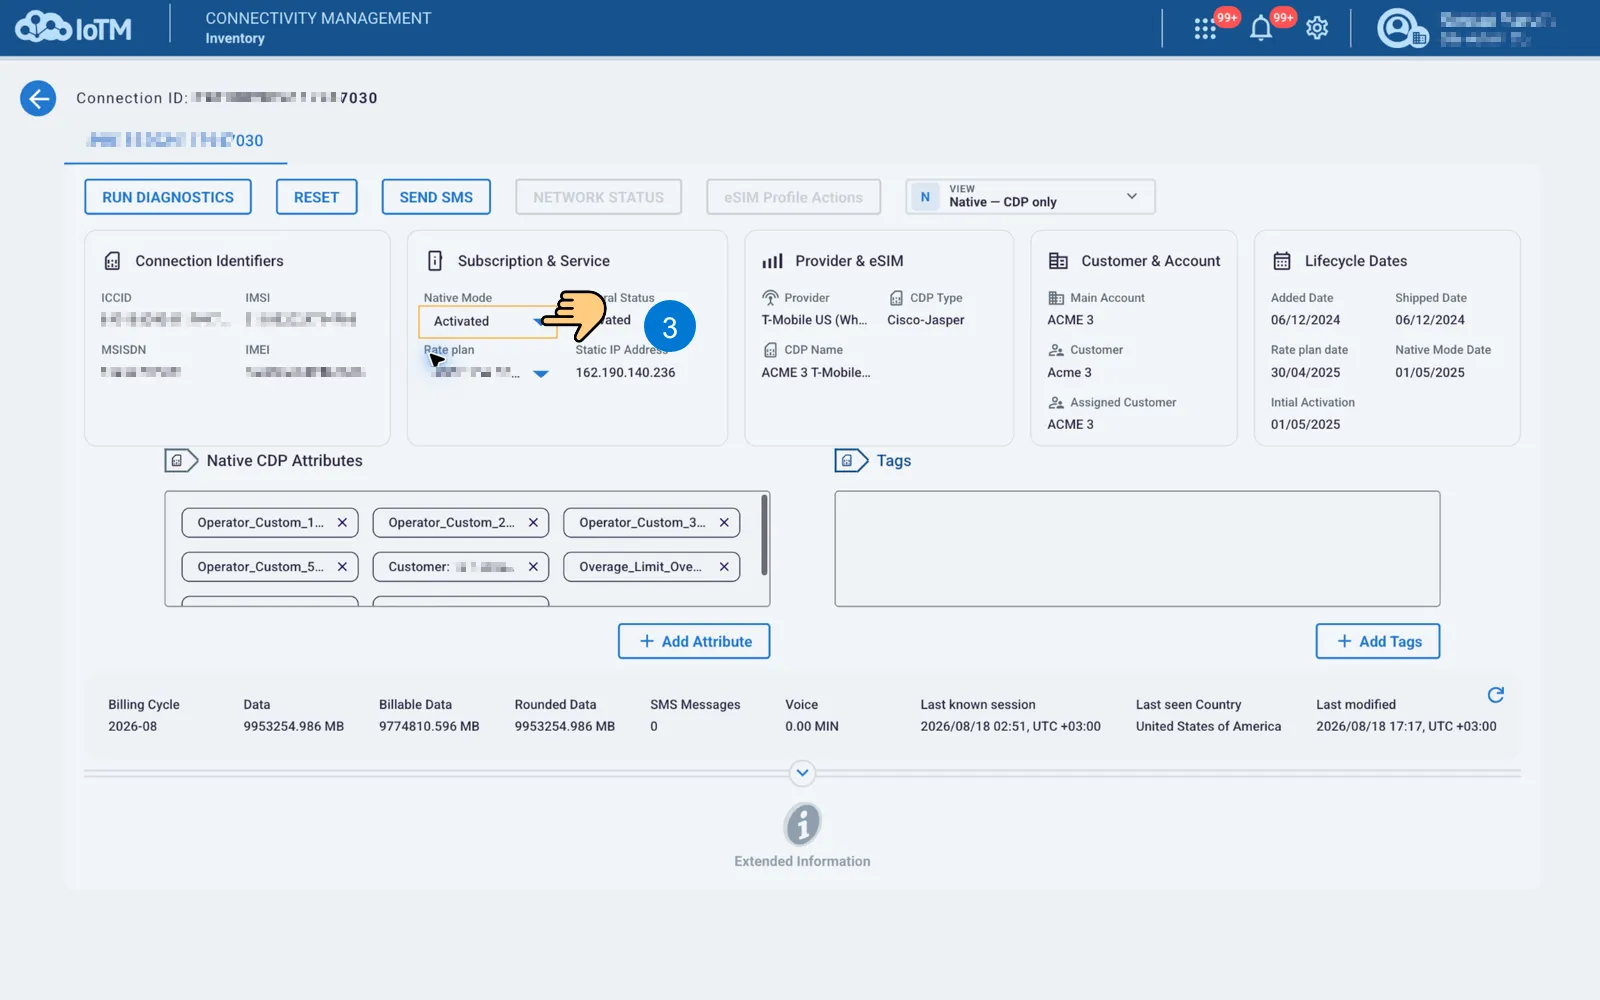
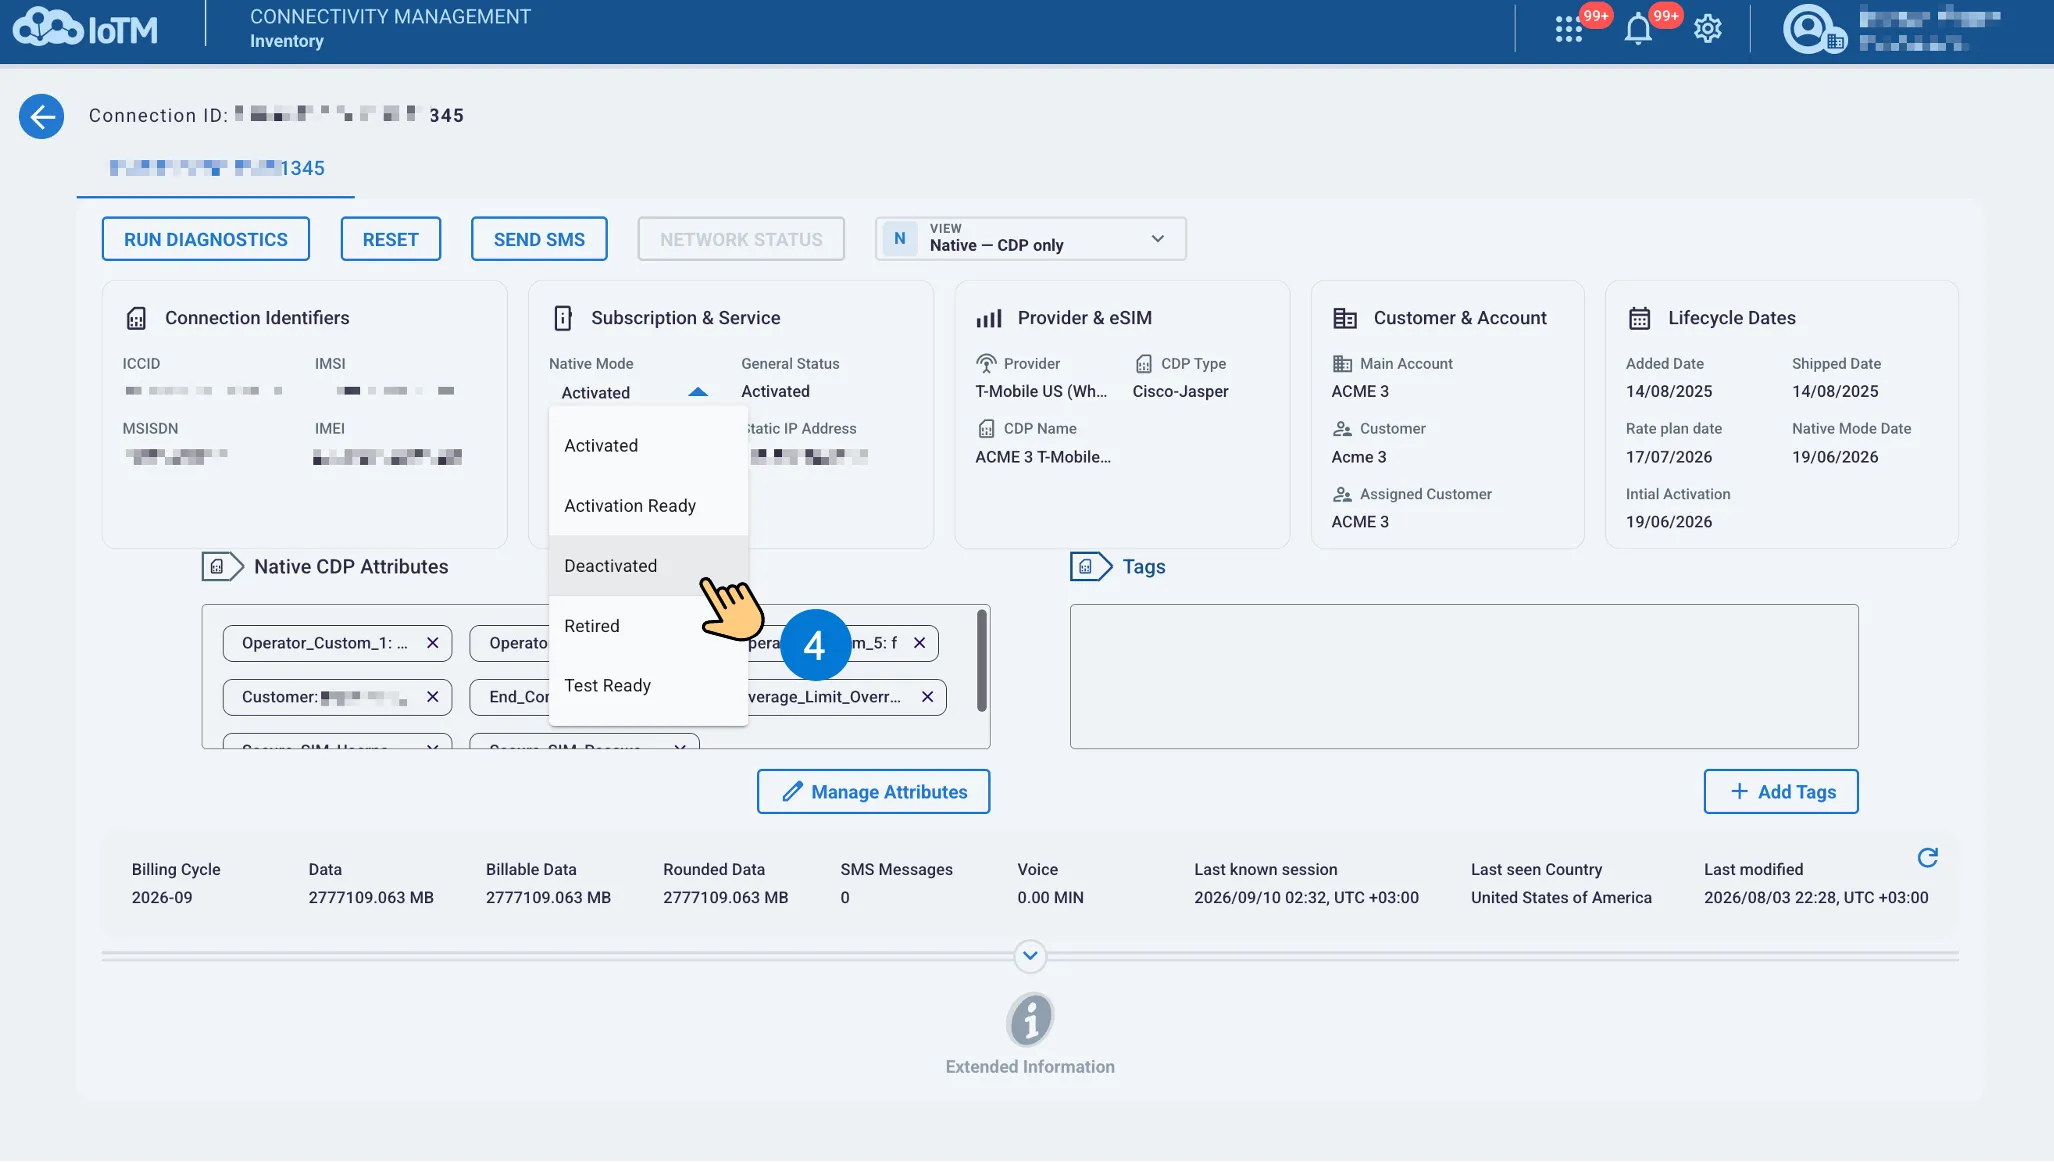
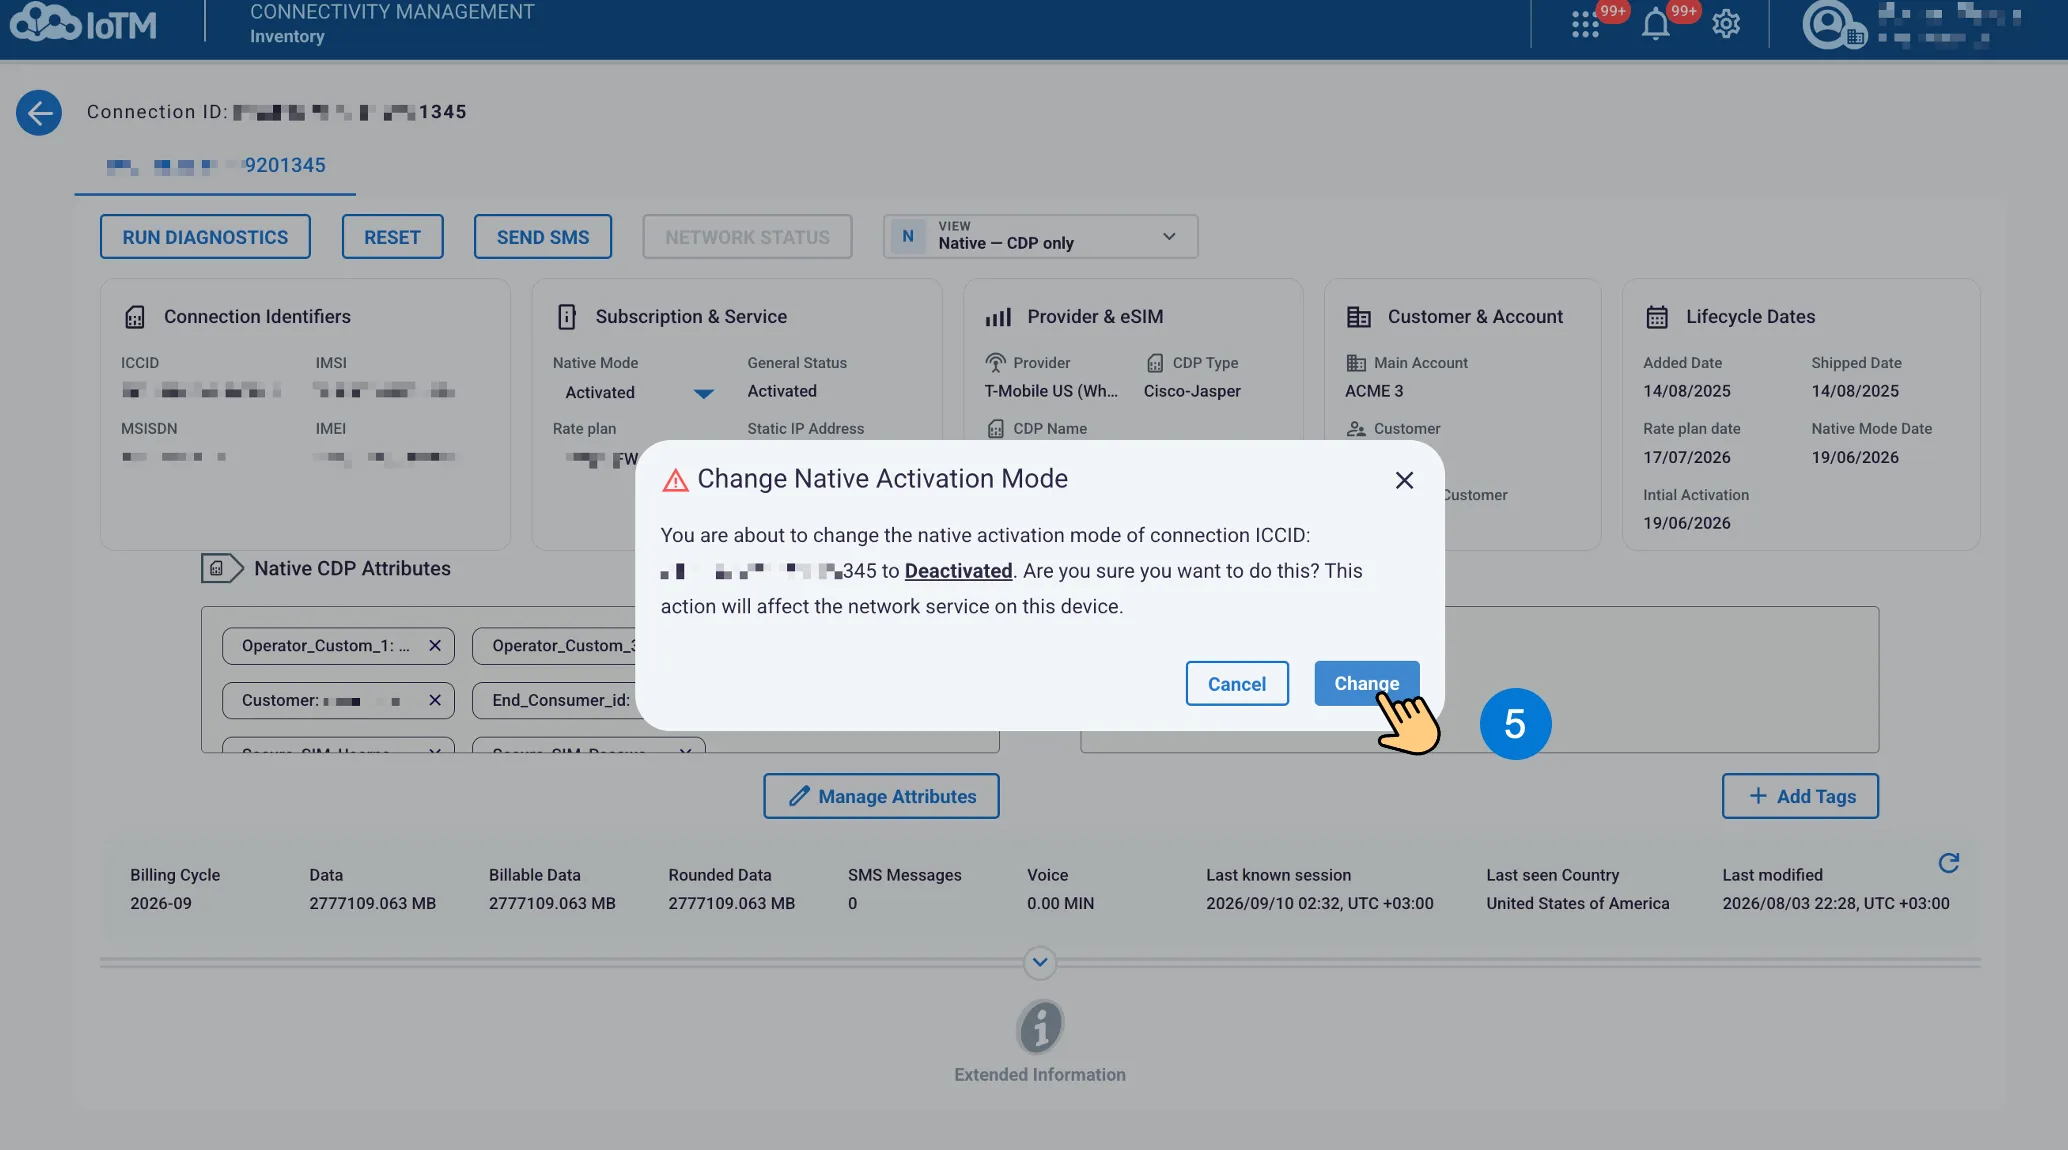
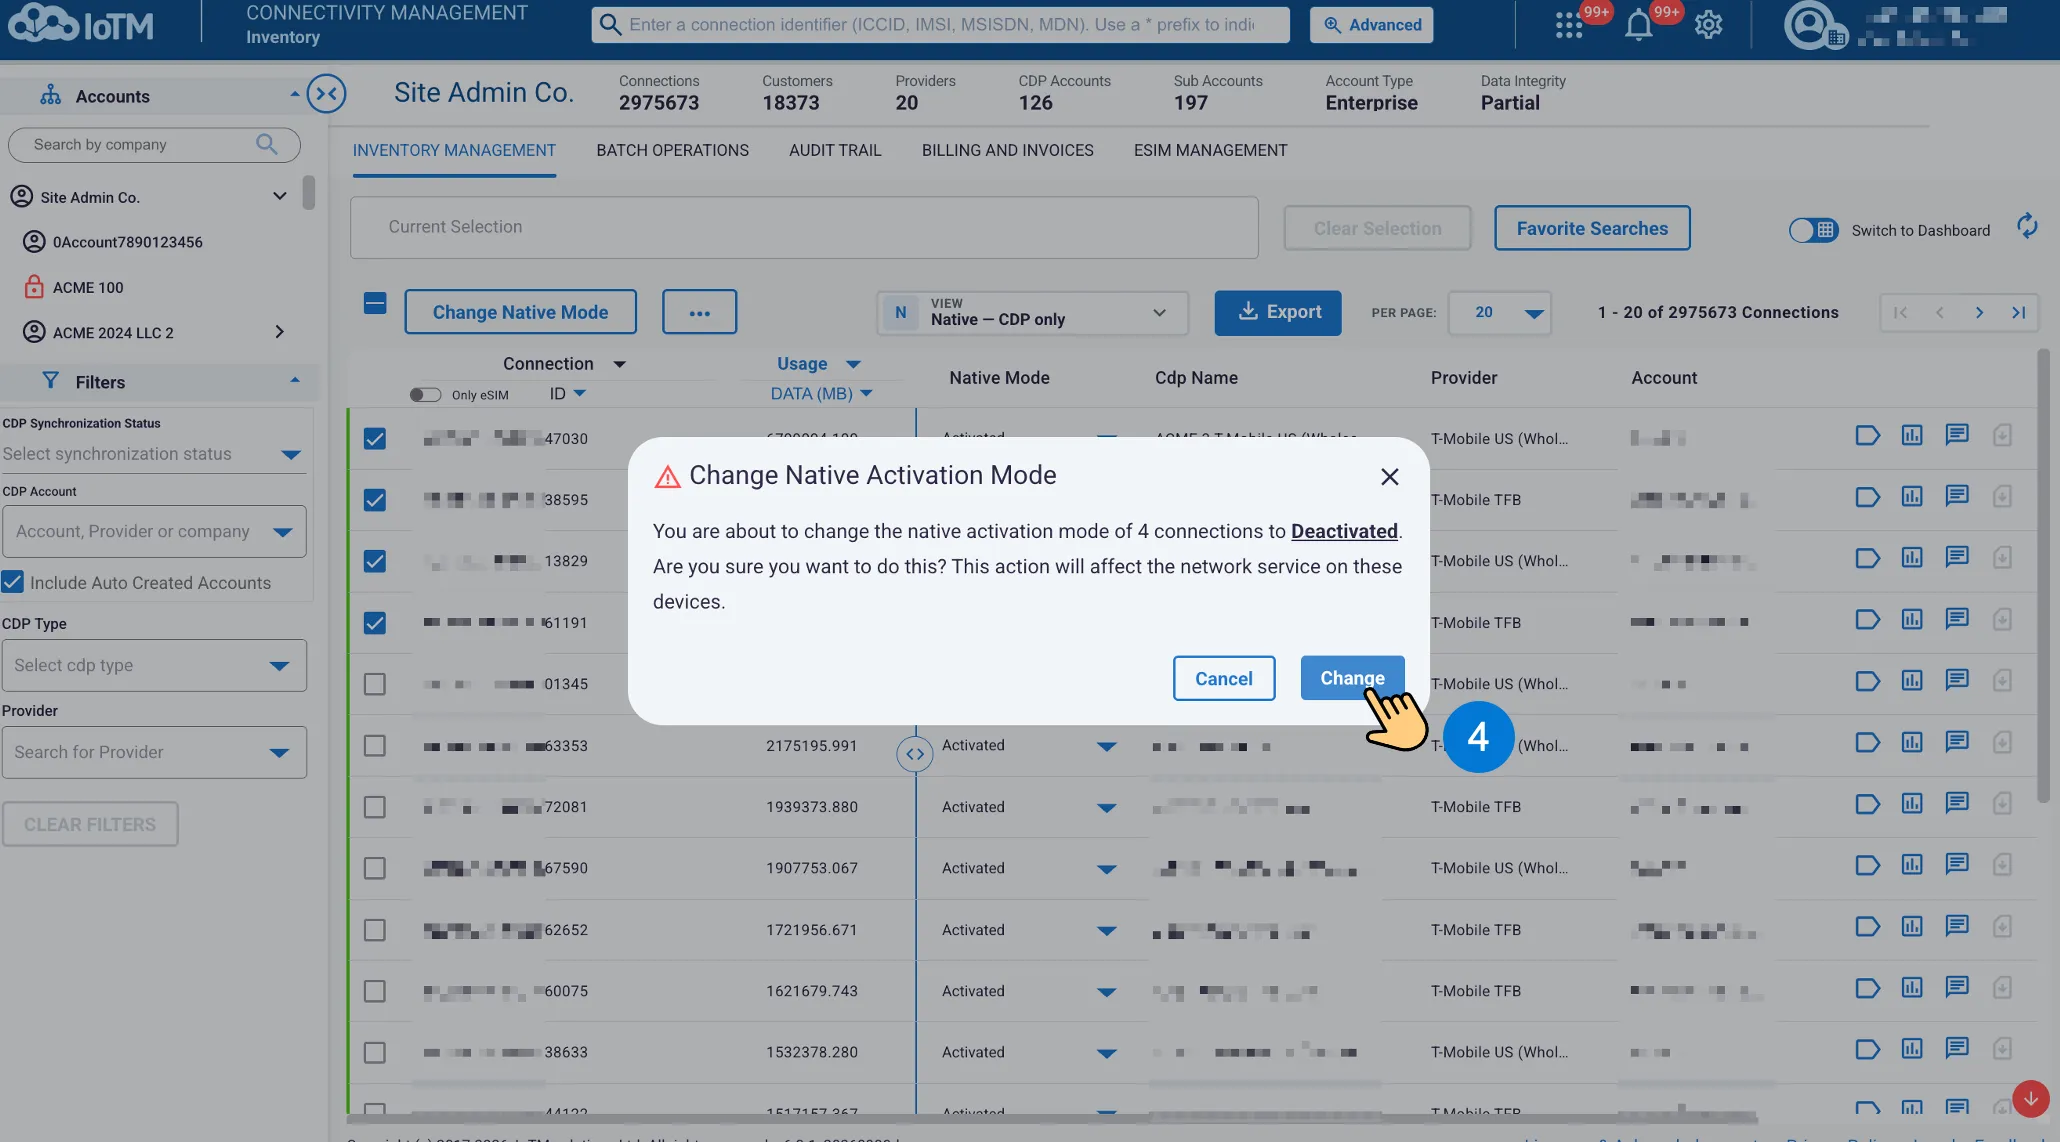
You can manually change a single Connection state status from the Inventory Management Detailed Page.
Location: ➀ ‘INVENTORY MANAGEMENT’ > ➁ Select Connection > ➂ ‘Native Mode’ drop-down > ➃ Select desired State > ⑤ Press ‘CHANGE’ in the pop-up Notification
10.1.2. Selectively Changing Multiple Connections’ Native Mode From The Active Page
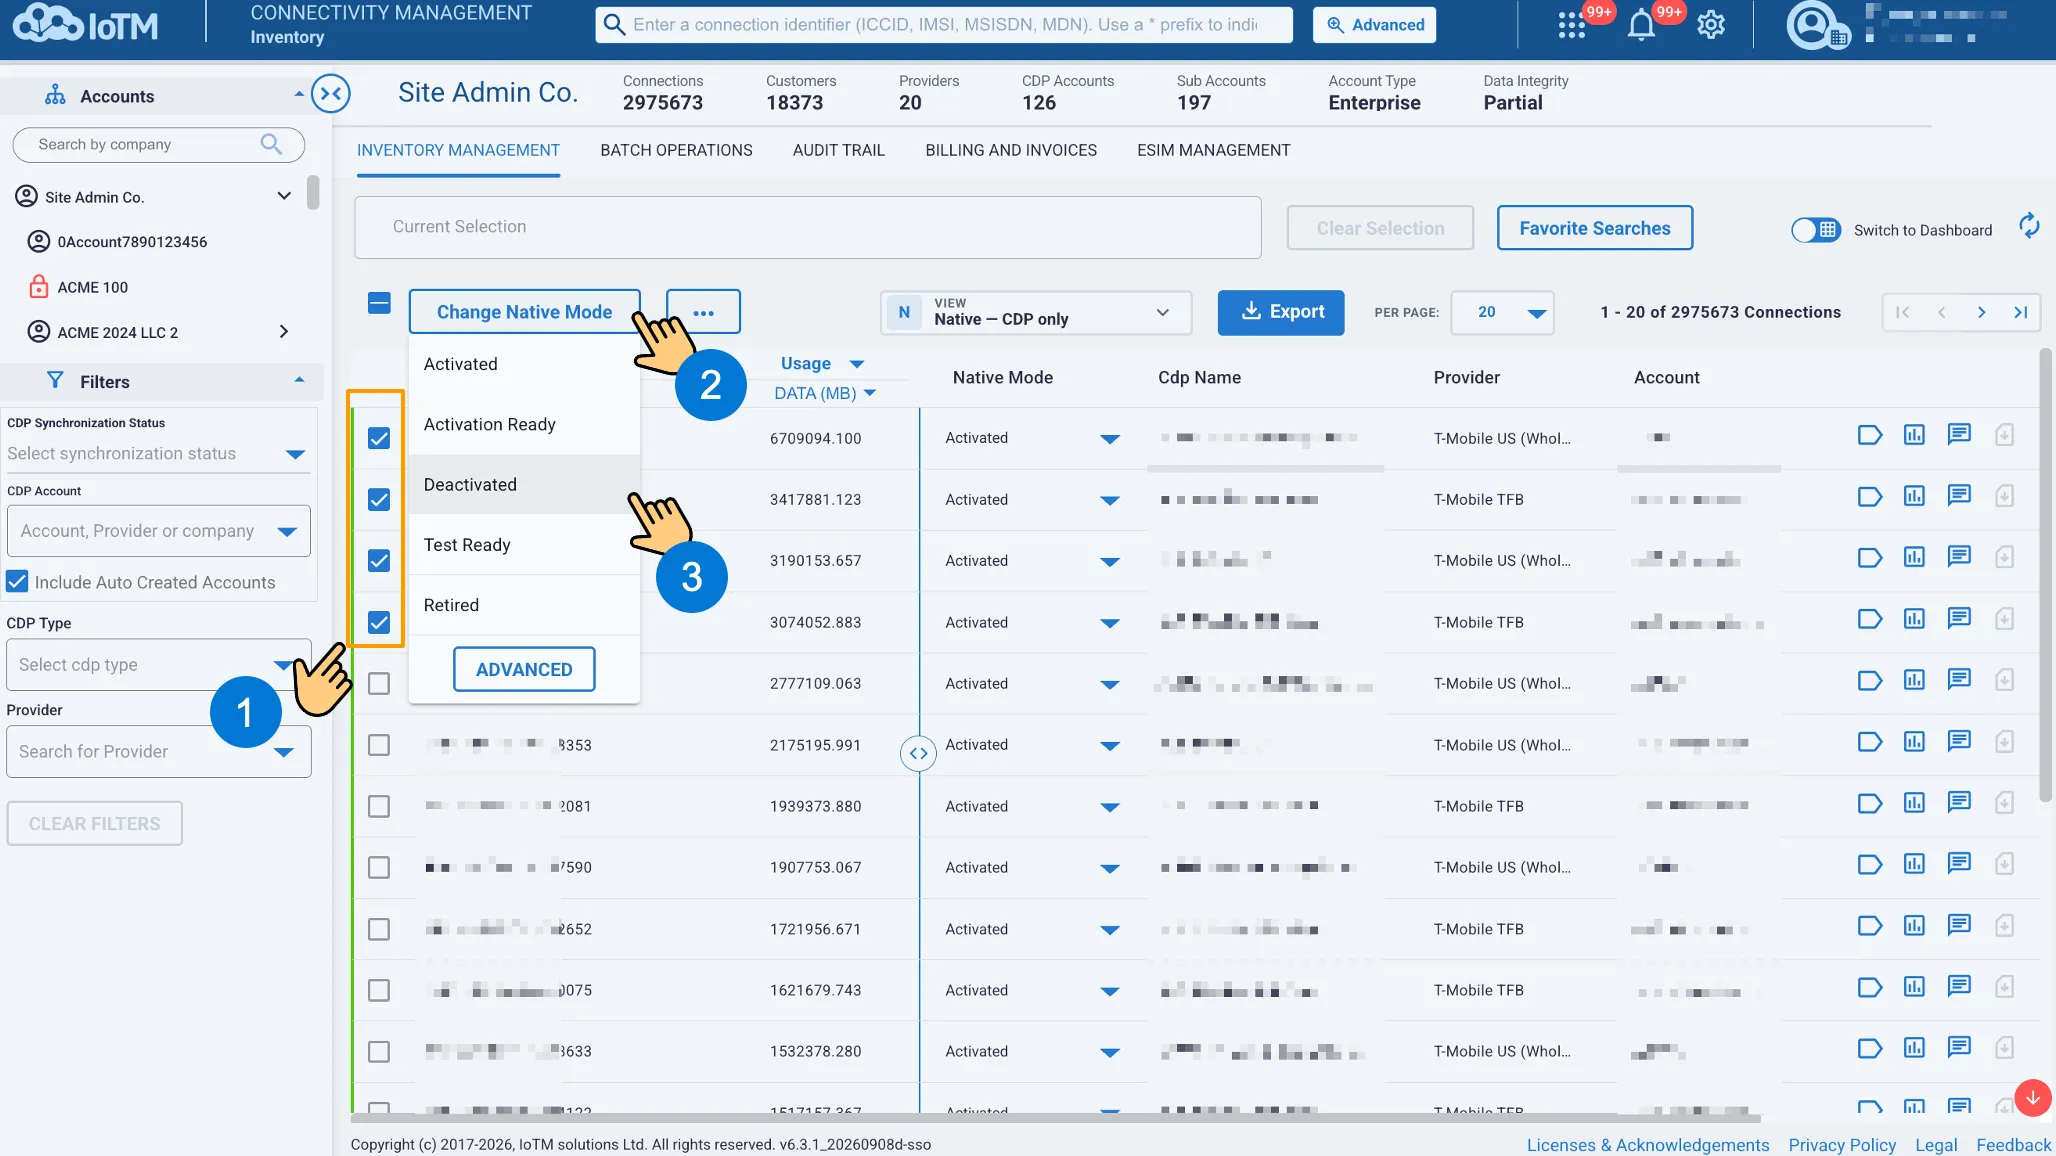
You can selectively change multiple Connections native mode from the Inventory Management Items grid list using the Connections checkbox.
Location: ➀ ‘INVENTORY MANAGEMENT’ > ➁ Select target Connections by clicking the Checkbox > ➂ ‘CHANGE NATIVE MODE’ action control > ➃ Select desired State > ⑤ Press ‘CHANGE’ in the pop-up Notification
10.2. Large-Scale Batch Changes in Connections’ Native Mode
Save on operations overhead by managing numerous Connections with a single request.
You can perform large-scale batch changes in Connections’ Native Mode via the Inventory Management batch operations campaign management functionality. If the connections population is based on a search criterion, you can initiate batch changes for up to 100,000 connections at a time directly from the grid without the need to upload files. If the batch change is for specific named connections based on connection identifiers, then you can initiate batch connection changes of up to 1000 at a time from the grid and up to 100,000 at a time with file uploads from the Batch Operations tab.
First step: Define the search criteria for the connections population that you want to select by using the filters, sorting and search operations.
Second Step: After you specify the target connections population through your search criteria, you need to select it and hand it over to batch operations. This can be done in the following manner:
Location: ➀ check the Select All checkbox > ➁ Press the banner informing you how many Connections can be selected that match the required criteria > ➂ Select the action to execute. In this case, “Change Native Mode” > ➃ Optionally, you can press the ‘Advanced' control button for additional fine-tuning.
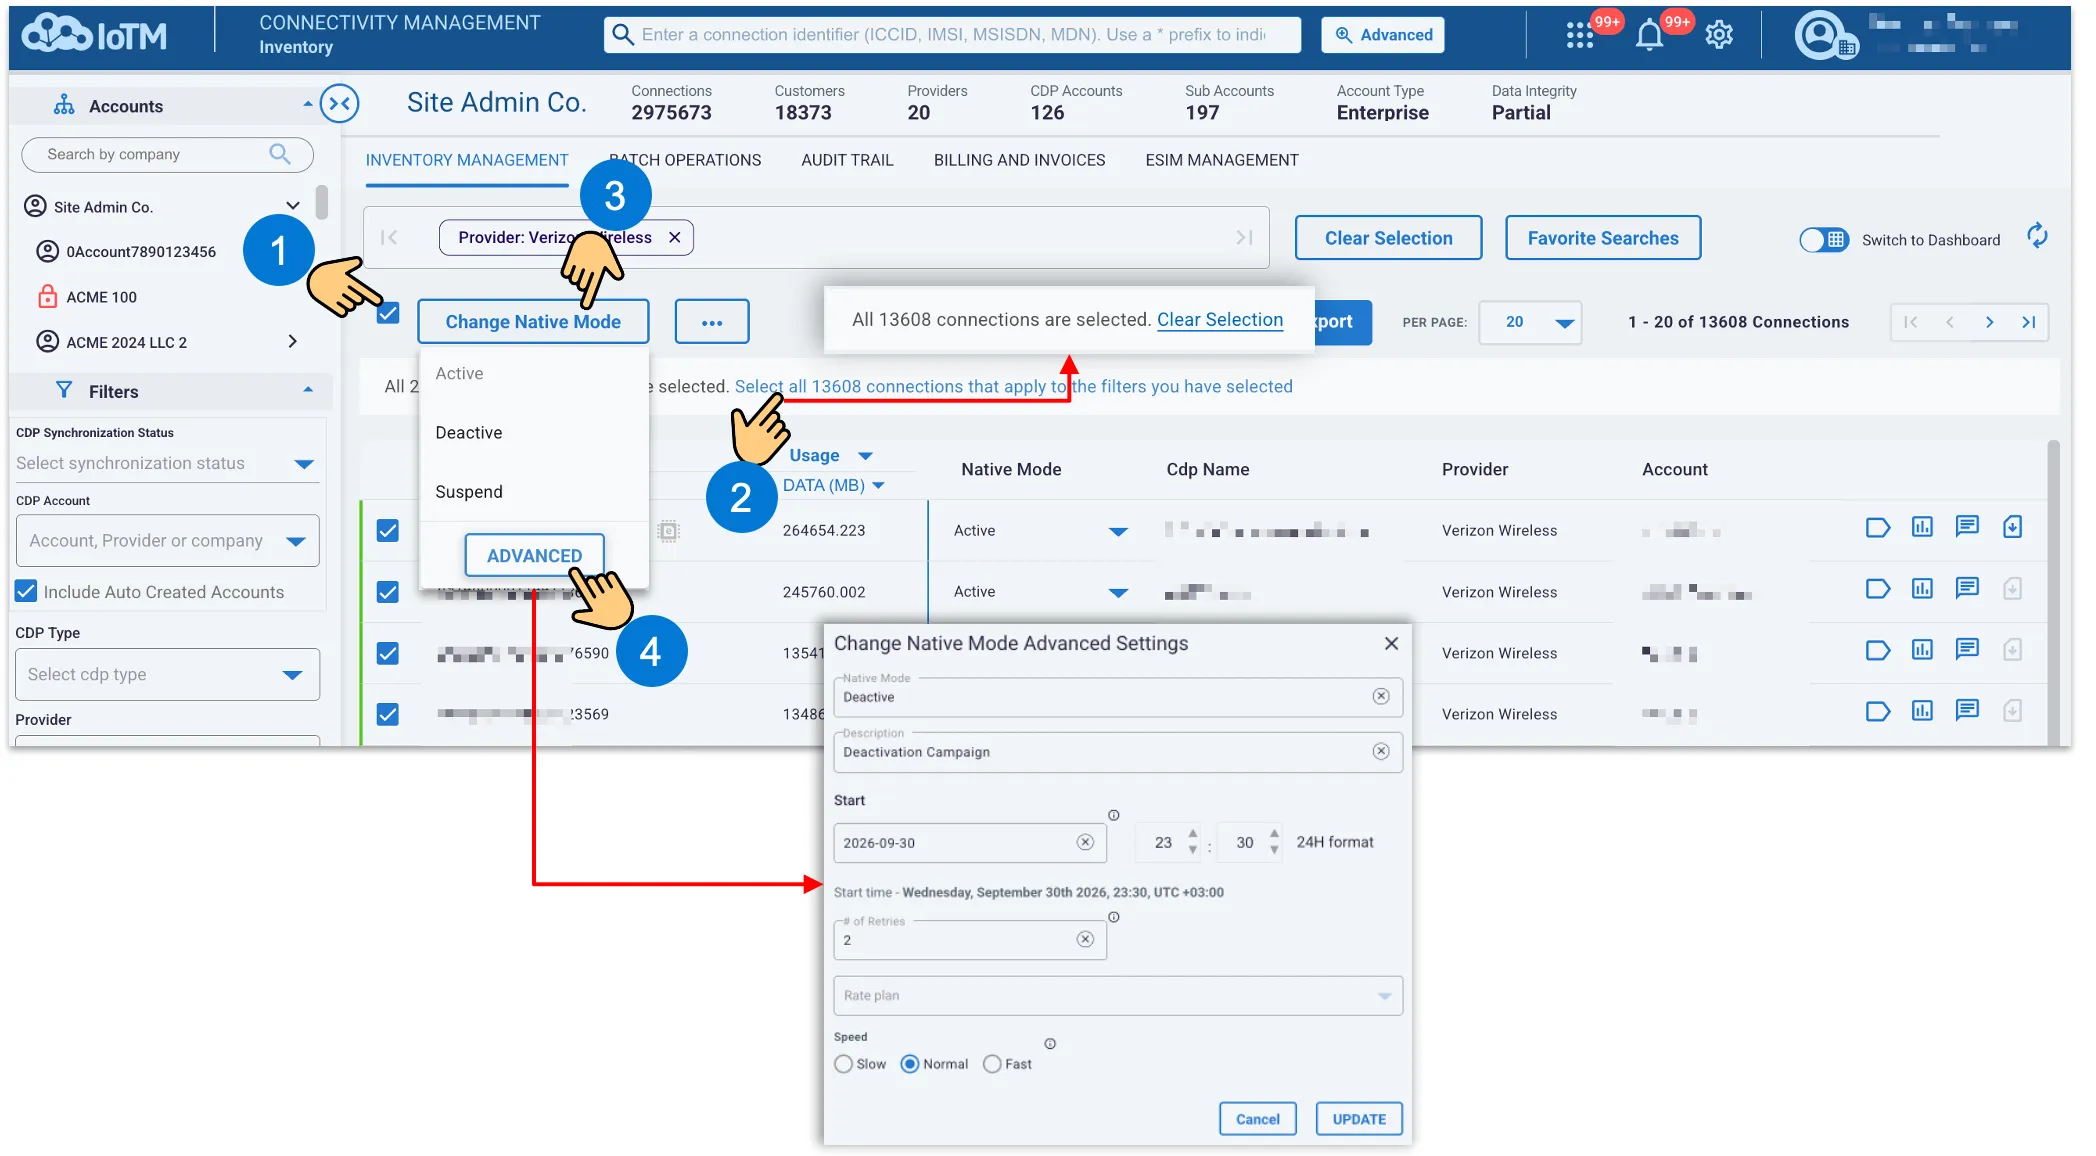
Third Step: you may optionally configure the batch jobs parameters using the Change Native mode Advanced Settings dialog, allowing you to submit a job for batch processing with a custom configuration.
Manually submitting a custom configuration batch job:
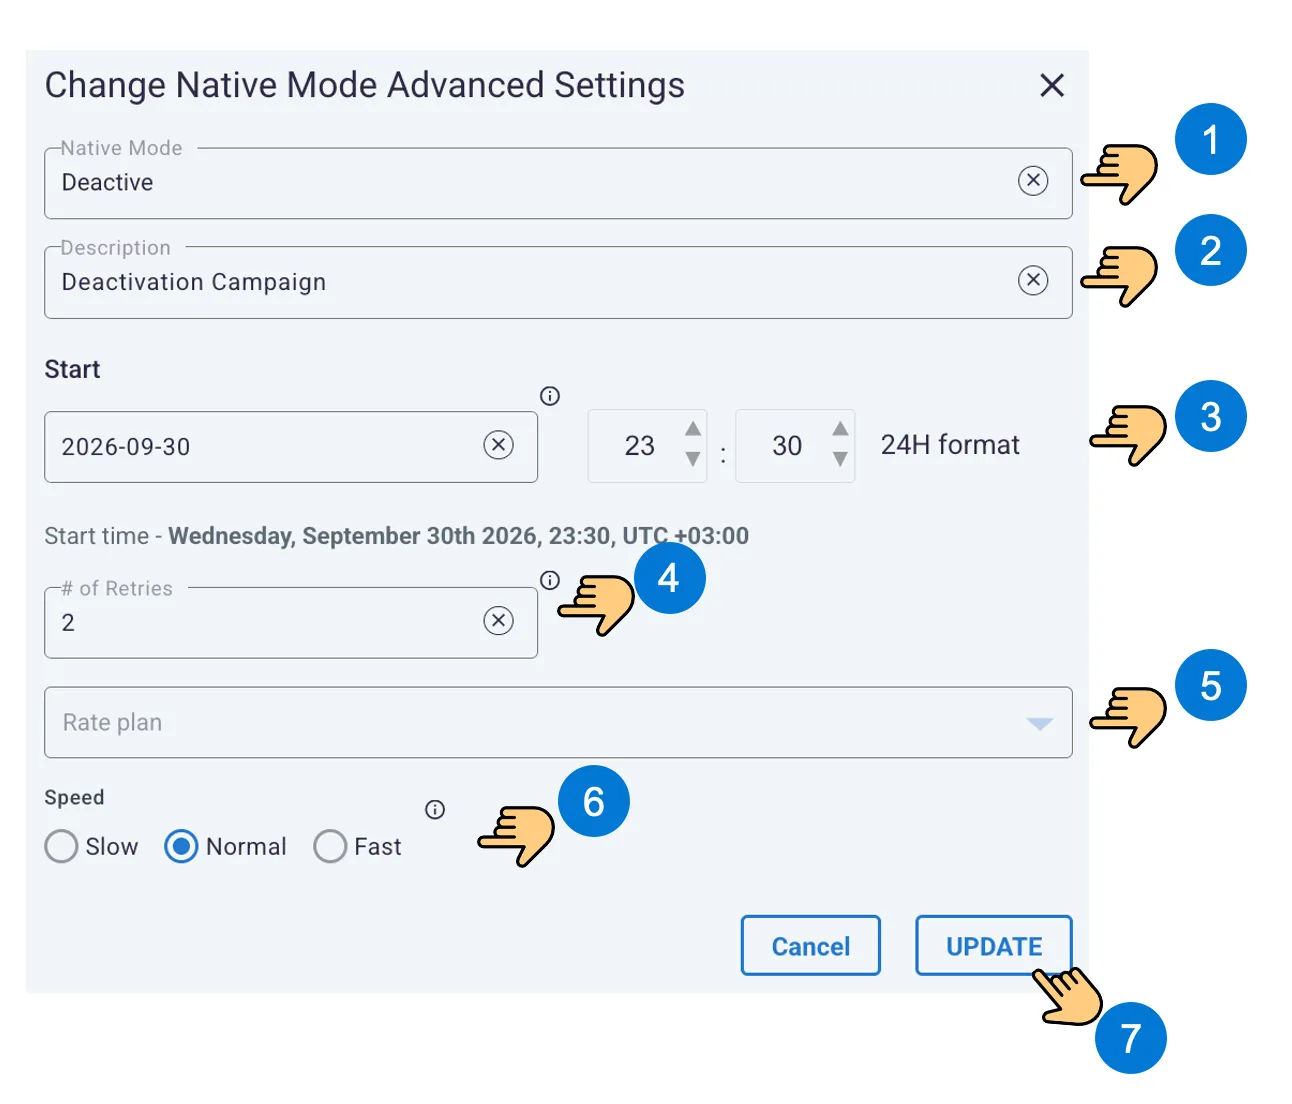
Batch Job form Interface Components
Interface Control | Description |
|---|---|
Native Mode | Search field and Dropdown list displaying a list of Native Mode states status values, from which the user may select one. The list includes The states applicable to the CDP type of the selected connections population. |
Description text field | Text entry box that enables the user to input text information for reference purposes, e.g. “Pause SIMs consuming over 5 GB” |
Start | Popup calendar graphical user interface widget which allows the user to select a batch job start date from a calendar. Click on the icon of a calendar such that when the icon is clicked on, the calendar appears. No input means start immediately. |
# of Retries | Dropdown list displaying a list of values representing the number of retries to automatically execute failed actions in the batch operation, from which the user may select one. The list options include: 0,1,2,3 |
Rate Plan | Search field and Dropdown list displaying a list of Rate Plan options available for this subscription, from which the user may select one. You may choose to assign both a change in Native Mode and a change in Rate Plan as part of the batch job configuration, or you may only select one. |
Speed | Select the frequency towards the underlying connectivity provider CMP platform. A high call frequency may result in shorter campaign times, but it might cause issues due to call rate limitations and require multiple retries. Includes a radio button that permits the user to choose from ‘Slow’, ‘Normal’ and ‘Fast’ one exclusive option. Normal is the default option. |