Navigating Account Management
Chapter 3: Manage Users, CDPs And Accounts
The IoTM platform offers a wide spectrum of management solutions, capable of accommodating individual organizational accounts, multi-account resellers, and extending up to comprehensive management of an MNO. This section will provide instructions on the management of a single organization account and will explain basic Account, Users and CDP management. Complex management of MNO and connectivity resellers is out of the scope of this document. To learn about this functionality, please refer to IoTM First Level Support Guide - Resellers in the References Section.
Access to the management section is done through the gear icon placed on the application top bar, as illustrated below.
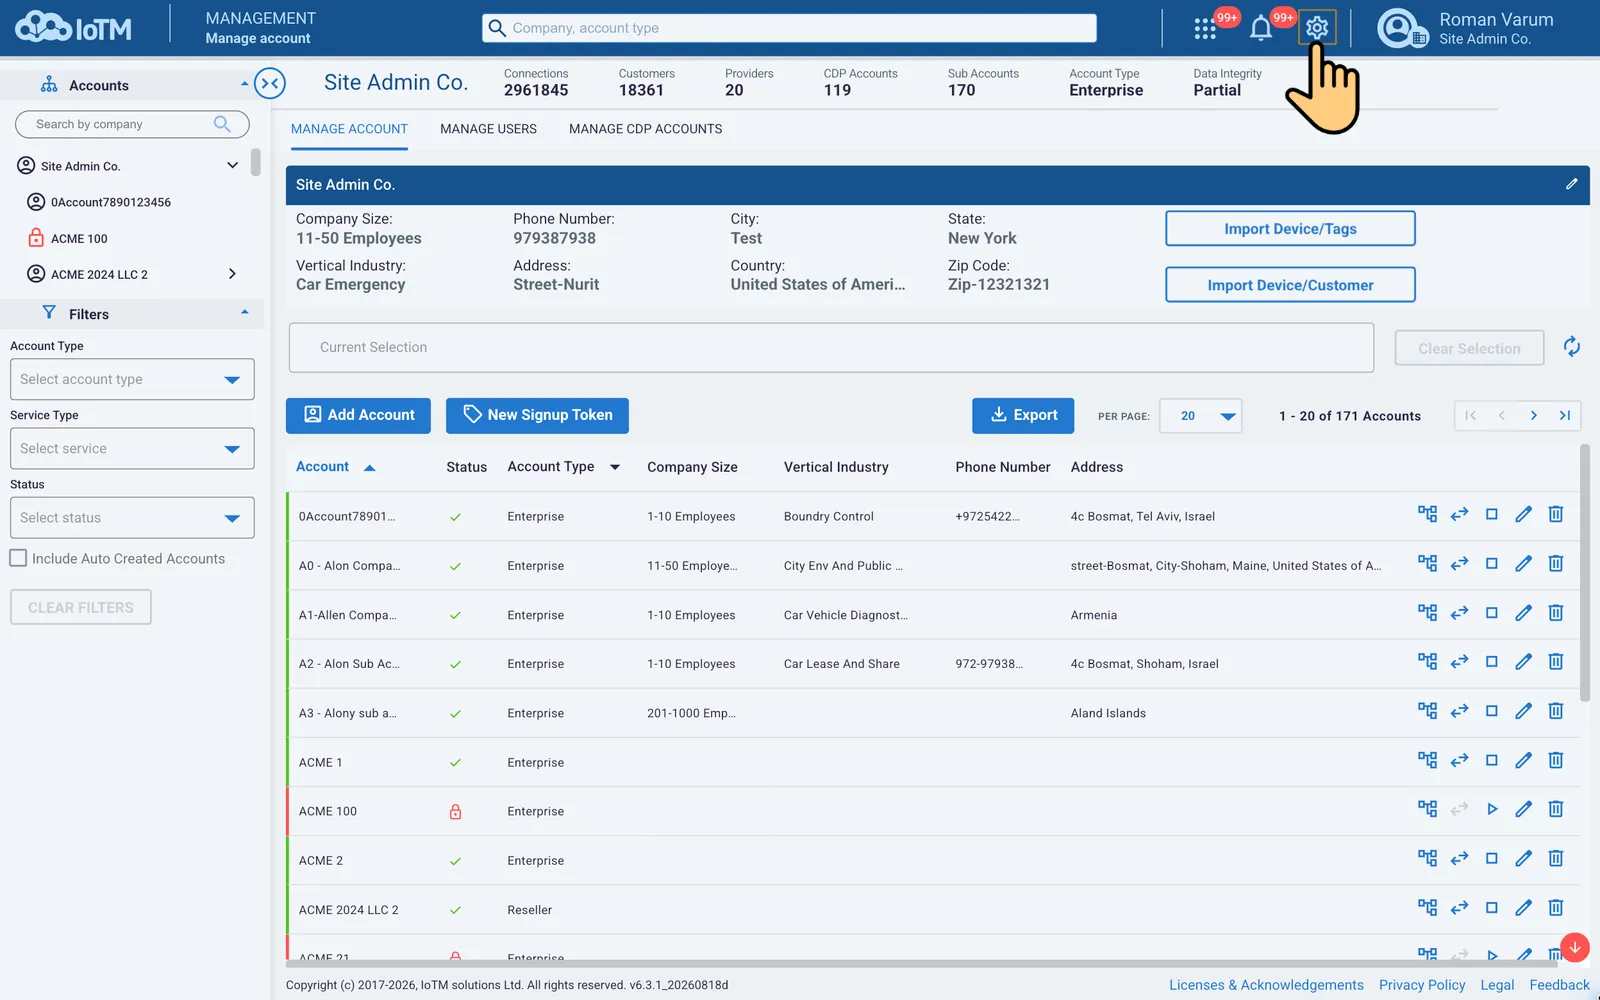
Management Gear Icon - Allows access to management
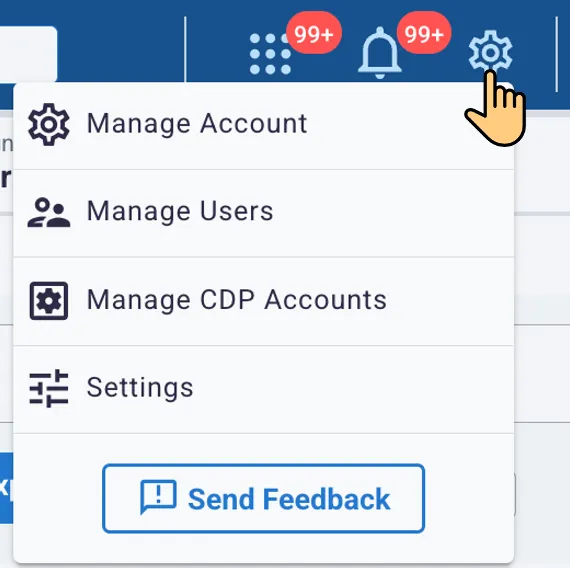
Management Menu - Allows access to the various management features (Account, Users and CDP accounts)
Note that the Account Management section (but not User Management or CDP Management) can also be accessed via the round domain switcher button next to where the username is displayed on the same bar, close to the gear icon. Clicking on the button and then pressing ‘Manage’ will take the user to the account management section as well.
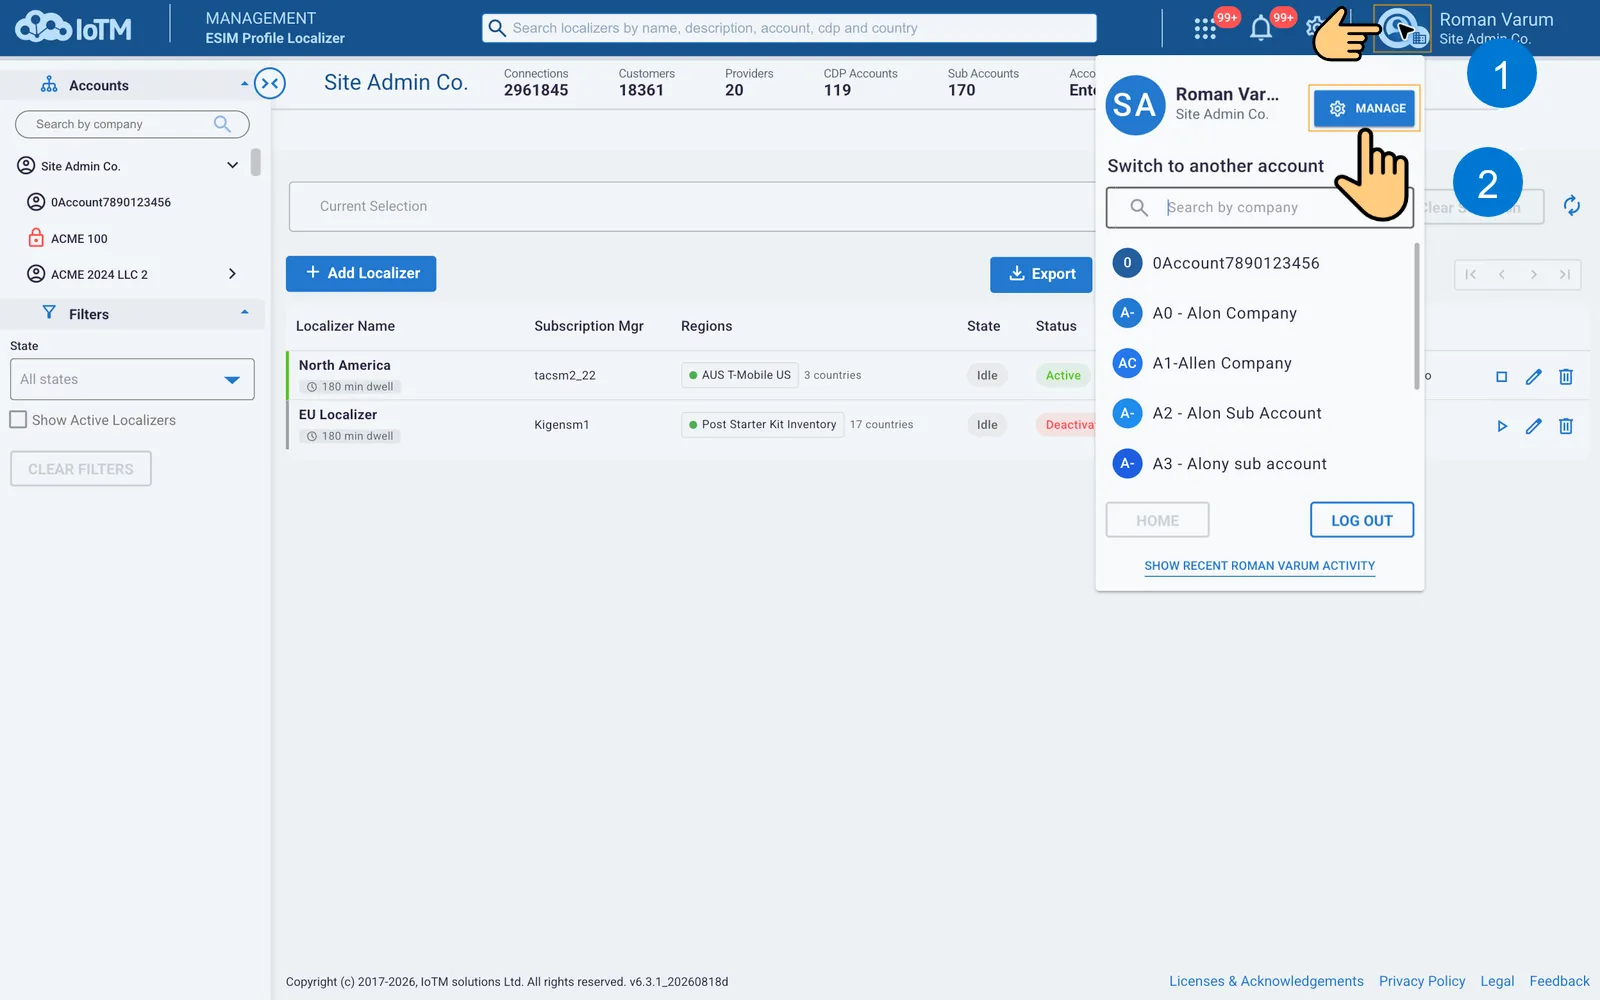
Accessing the Domain Switcher from inside the Connectivity Management module
By default, IoTM platform accounts have access to the basic management features mentioned in this section. There are rare cases such as demo accounts or accounts that were set up in a bespoke manner in which the gear icon will be disabled and the account has no internal management authorization, and there are cases such as resellers and operators where accounts have extended authorizations to create and manage their sub-accounts as well.
6. Basic Account Management
6.1. Overview
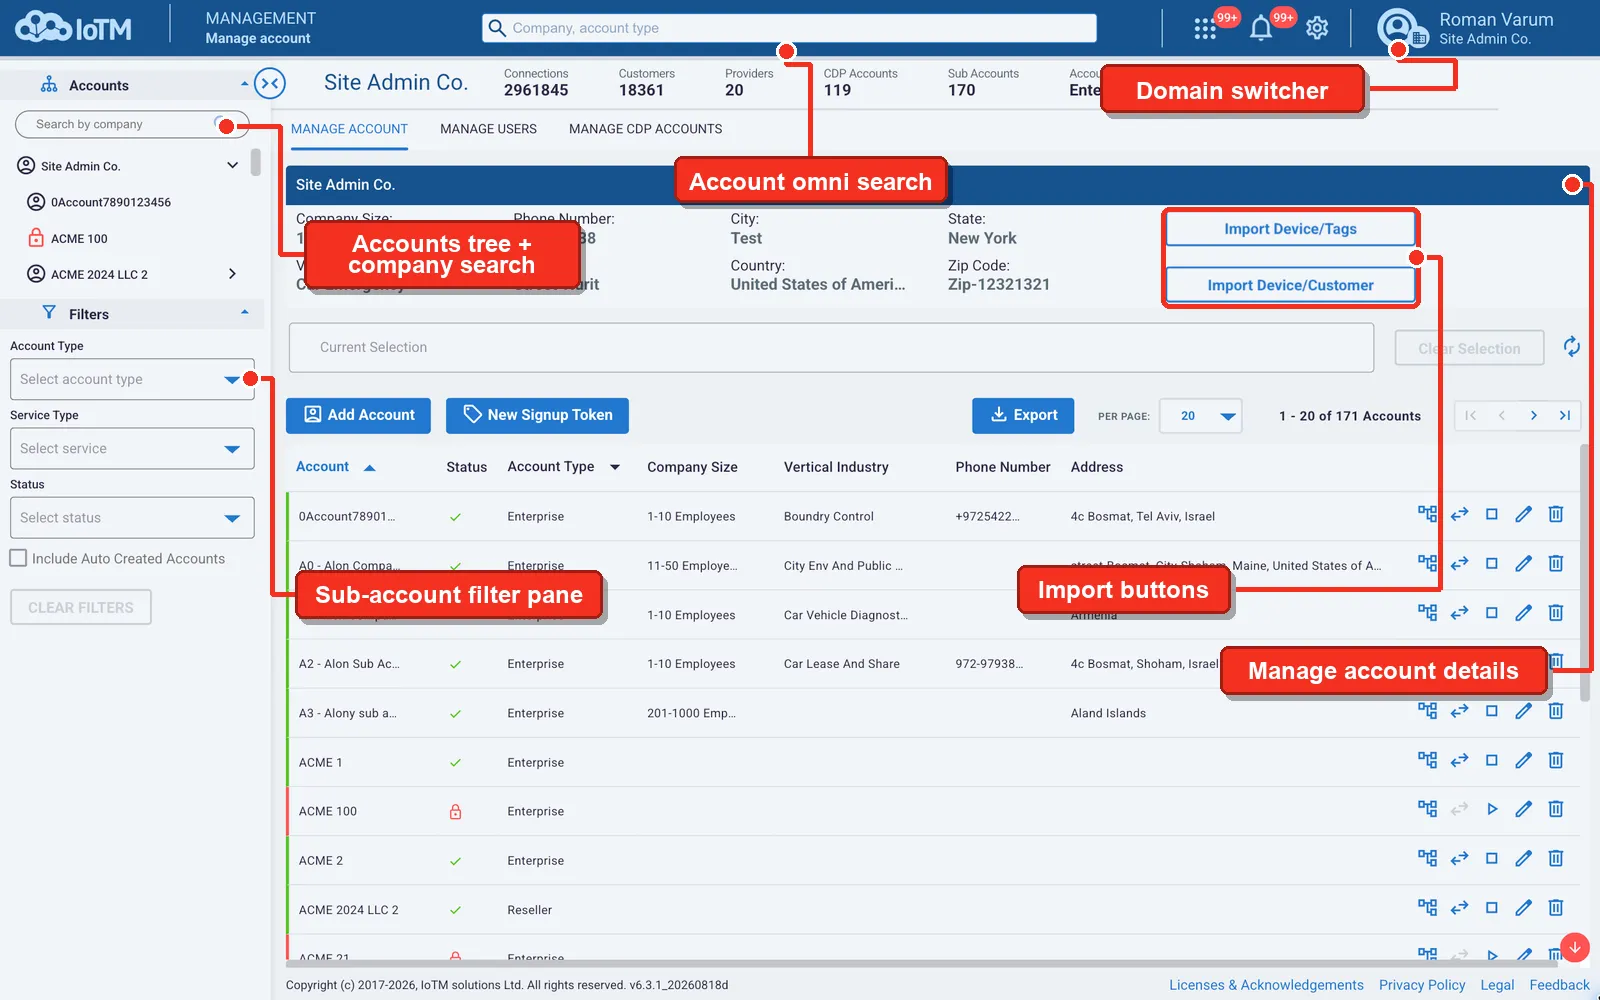
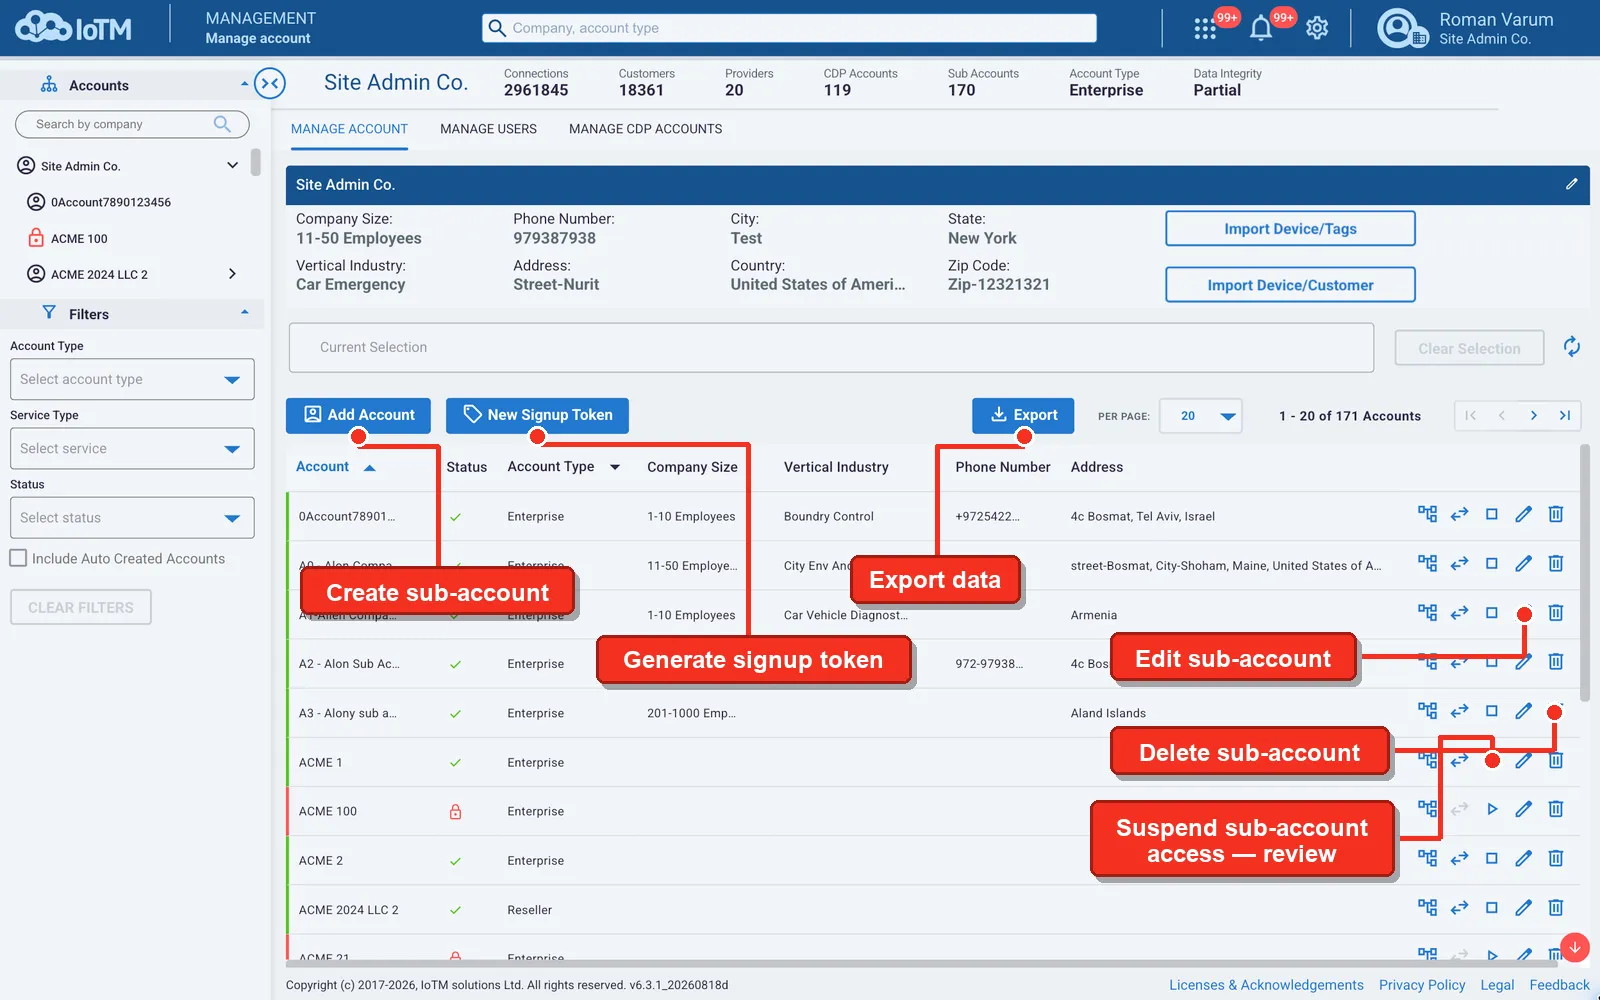
Account Management main view
Control descriptions
Control | Description |
|---|---|
Sub-account Tree and Tree Search | Shows a tree view of the sub-accounts and a “search as you type” line above the tree. Once a sub-account is selected from the tree, then it is filtered in, other accounts are filtered out, and edit actions are performed on the selected account. |
Sub-account Filter Pane | Offers common filters when searching for sub-accounts. |
Create sub-account | Opens the sub-account creation dialog. Out of the scope of this document. It is applicable mainly to IoTM re-sellers and Connectivity Service Providers (CSP). To learn about this functionality, please refer to IoTM First Level Support Guide - Resellers in the References Section. |
Generate signup token | Opens the self signup token generation dialog. Out of scope for this document. It is applicable mainly to IoTM re-sellers and Connectivity Service Providers (CSP). To learn about this functionality, please refer to IoTM First Level Support Guide - Resellers in the References Section. |
Account omni-search | Allows searching sub-accounts in the grid below it by company name or account API identifier (account username) (used to identify the account in API calls). You can use a partial search term as well. |
Import Buttons | Enable to import end customer device associations and free SIM subscriptions (connections) tagging in bulk as CSV files. |
Export data button | Downloads the details of the current accounts selection in Microsoft Excel © or CSV format. |
Edit sub-account | Edits sub-account details, security settings (2FA) and additional services access. |
Delete sub-account | Permanently deletes a sub-account (irreversible action). |
Suspend sub- account access | Suspends users’ access to a sub-account and suspends all the service contracts associated with the sub-account without actually deleting it or its associated CDP accounts. This is reversible by the IoTM pod or the parent account administrator. |
Manage Account Details | Enables to manage the details and parameters of the account the user is logged into, or the account selected in the left-hand tree. |
Domain Switcher | Offers navigation between sub-accounts that are accessible to the parent account, as well as logout options and a shortcut to account management. Switching into another account will be very similar to logging into that account directly. It is always possible to go back to the home parent account by clicking the button with the “HOME” label on it to the left of the LOGOUT button. |
6.1. Navigating Accounts and Logging out
To navigate between accounts, including shortcutting to the Manage Accounts section, or to log out from any location on the platform, the user can click on the Domain Switcher round button located at the top right-hand side of the application bar. This allows one to easily switch between accounts without leaving the module that they are using – e.g., without exiting Connectivity Management or Analytics, etc. Switching to another account will automatically update the relevant data displayed in the respective section of the platform to the data relevant and visible to the account being switched into. It is very similar to directly logging into that target sub-account.
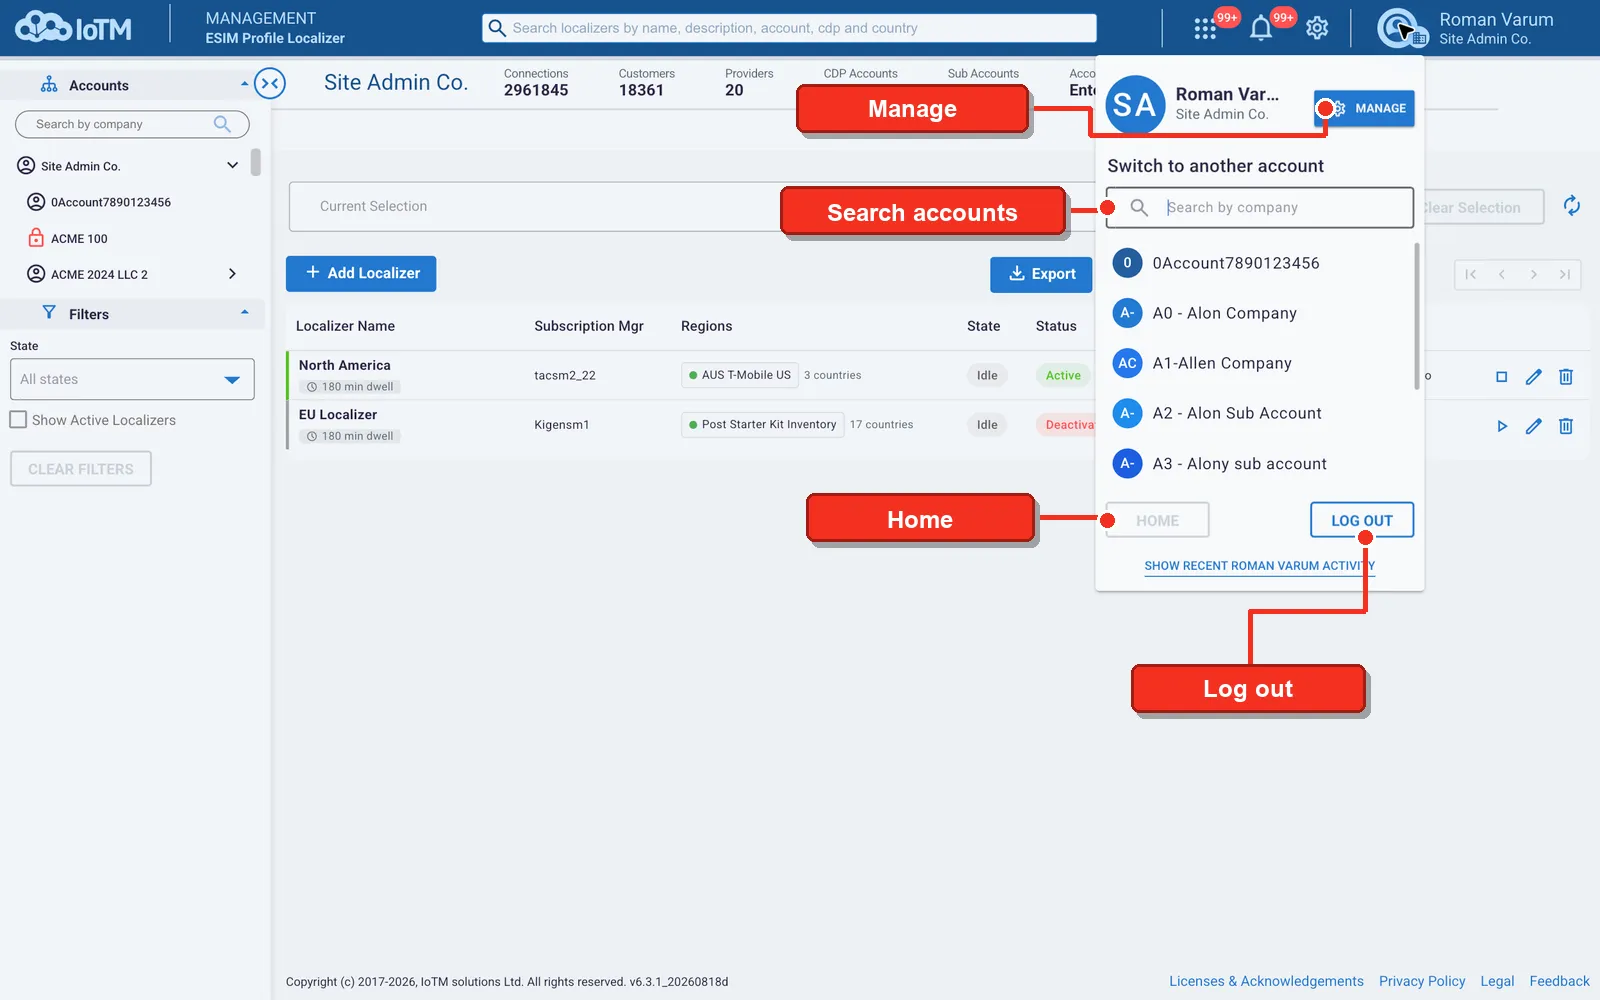
Control descriptions
Control | Description |
|---|---|
Manage | Shortcuts to the Manage Accounts section from anywhere on the platform. |
Search accounts | Shows a list of all the sub-accounts that the user can see and, if authorized, and also switch into. This is displayed with a “search as you type” line above the list. The user can click on an account to switch into it, and all the respective data in the portal will update automatically. It's important to note that different accounts may have access to different tools and applications within the platform. As a result, switching accounts could redirect you to the ‘Launchpad’ starting page – for instance, if the user switches to an account that isn’t subscribed to Analytics while being on the Analytics page. In all cases, the currently selected account name will be displayed next to the avatar, below the username after switching into it. |
Home | This button will become enabled when the user finds themselves inside a sub-account. Clicking on ‘Home’ will switch the user back into the parent account. Switching is done on the existing session without the need to logout and log back in again. |
Log out (all devices) | This will log the user out of all existing sessions on all devices, except the current session. |
Log out | Clicking this will immediately log the user out of the current session. |
6.2. Managing Account Details
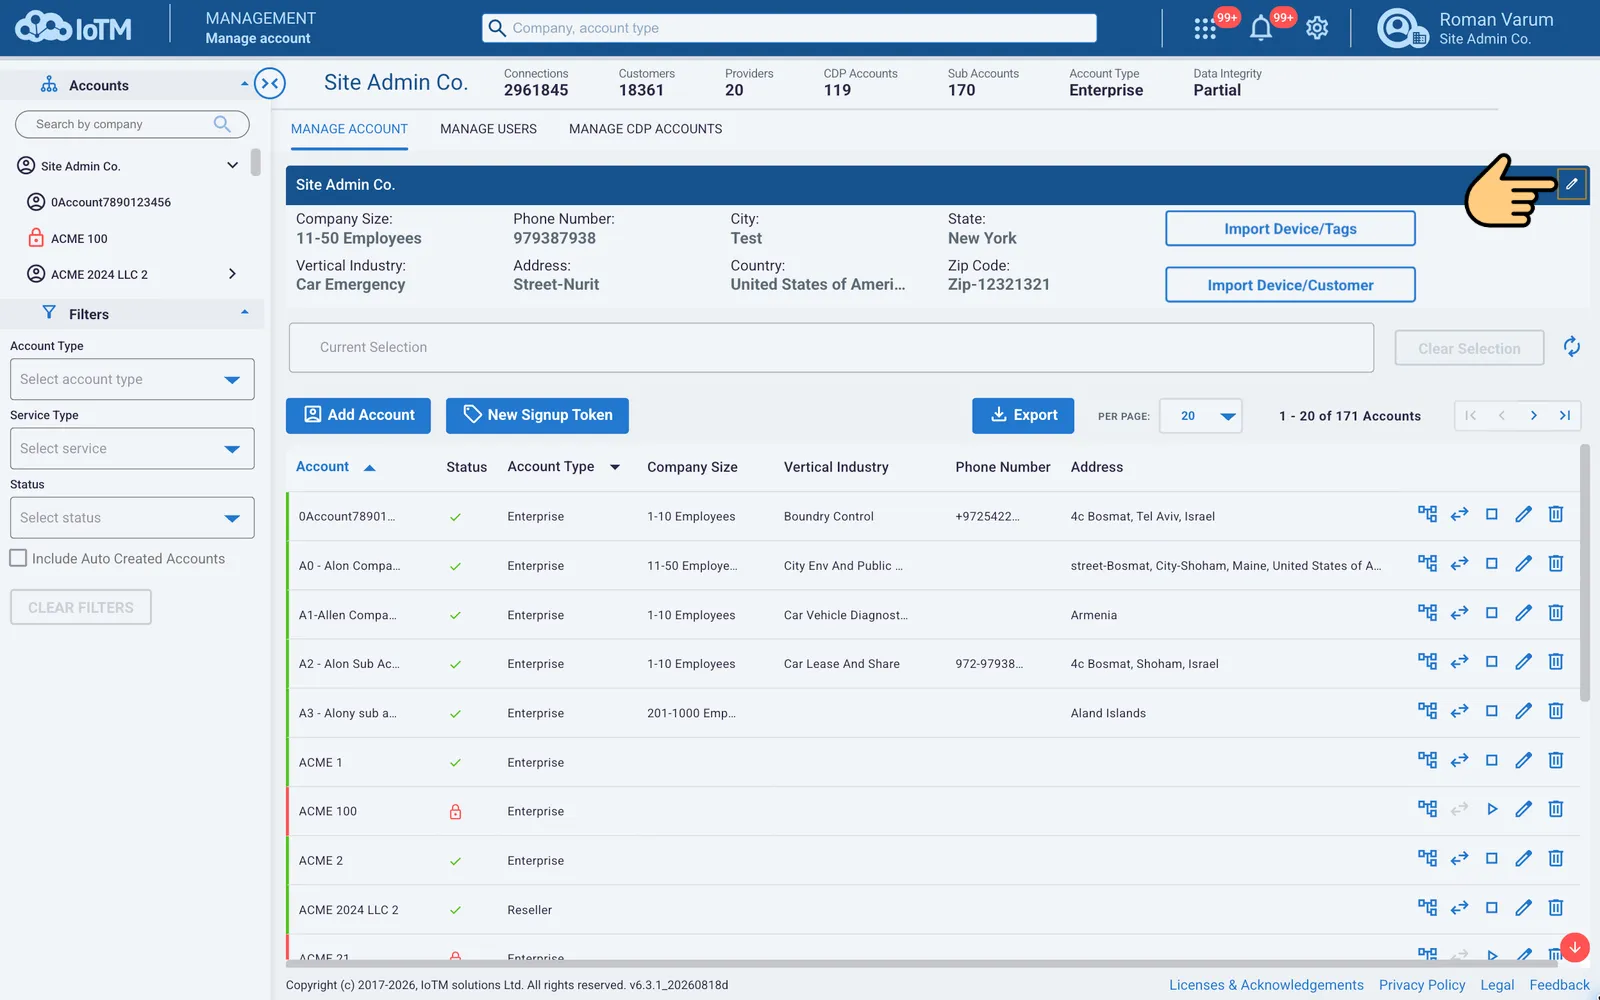
Accessing account details
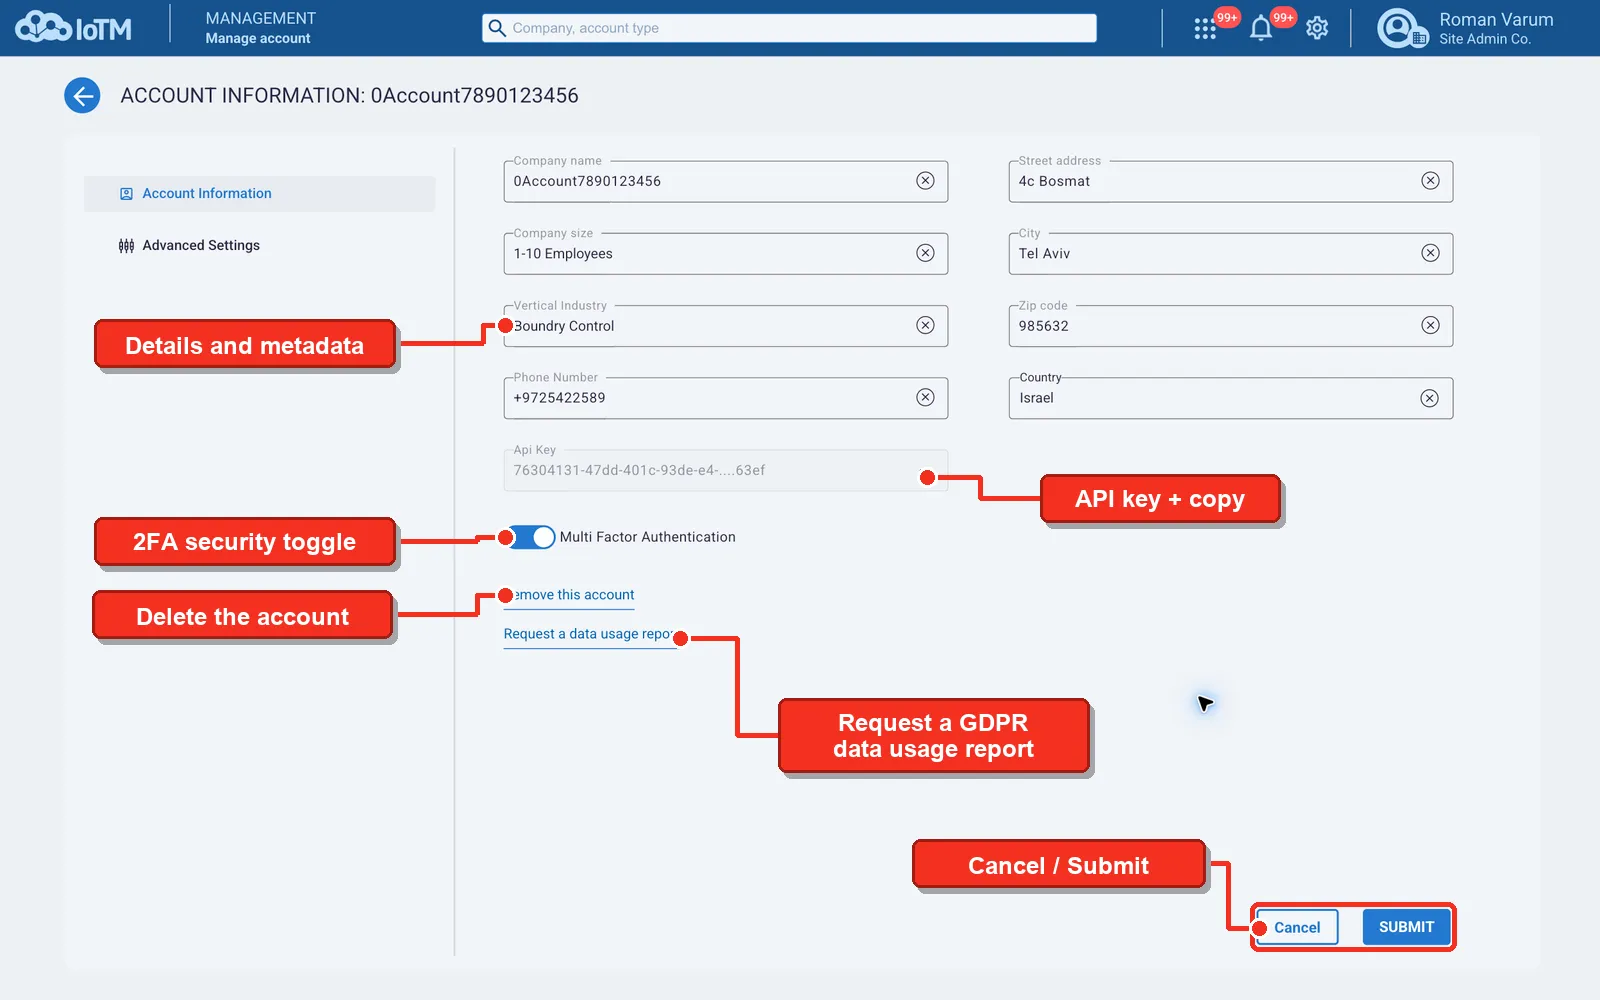
Account Information Dialog (Main account settings dialog). This dialog is only available to account administrator role users.
Control descriptions
Control | Description |
|---|---|
2FA security setting toggle | Enables and disables the 2-Factor authentication login method as described in Managing Multi-Factor Authentication & Security below. This affects 2FA at the account level. Therefore, if 2FA is enabled at the account level, it is explicitly enforced on all users in the account, and they cannot turn it off at the individual user level. If it is disabled, then each user can individually decide to activate 2FA or not. |
Details and Metadata | Details fields on the account, such as company name and other optional metadata like size and contact information. |
Delete the account | Permanently deletes the account after a confirmation process. This can only be done by an administrator role user. |
Request a GDPR data usage report | Triggers a data usage report. |
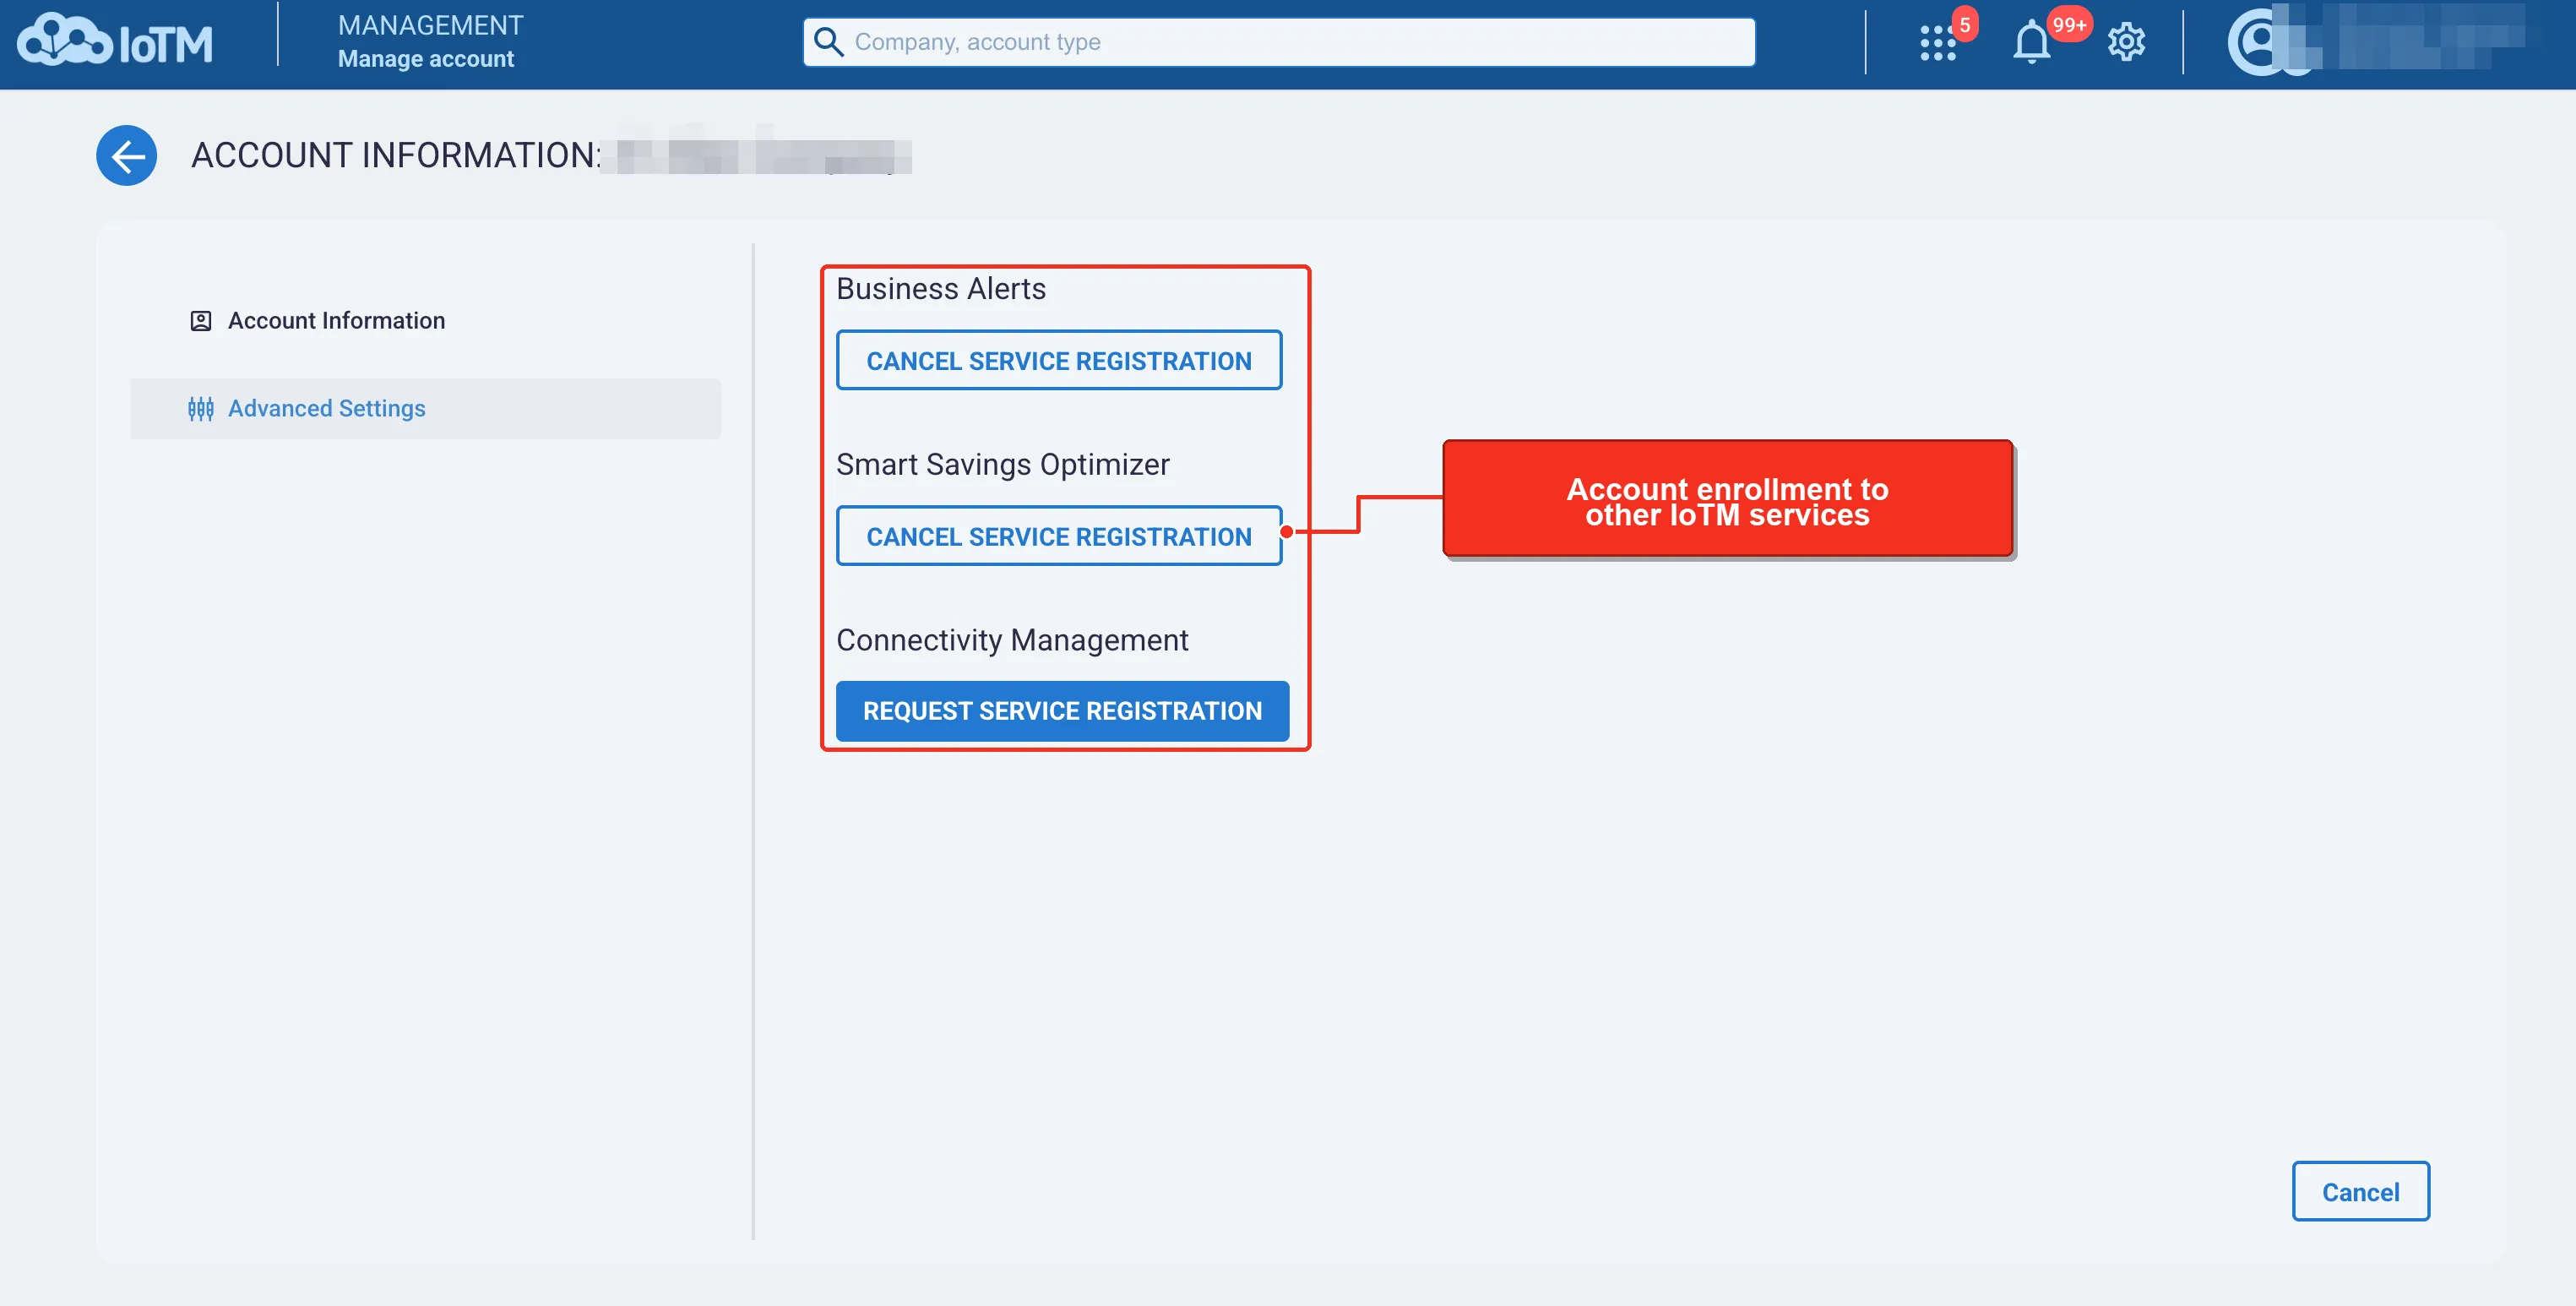
Account enrollment to other IoTM services | Buttons to enroll or request the enrollment of the account to IoTM services like business alerts and smart savings optimizer. |
API Key section | The API key generated for the account upon creation, clicking on the copy icon will copy the API key to your local computer clipboard so that you can use it in API calls. |
Cancel / Submit buttons | Buttons to either submit changes or cancel the dialog without applying any changes. |